[TUTORIAL] the BOWL
Tutorial - How to make a metal BOWL?


This tutorial takes you through the process of shaping a metal bowl - Preparation, Shaping Form, Refinement.
[PREPARATION]
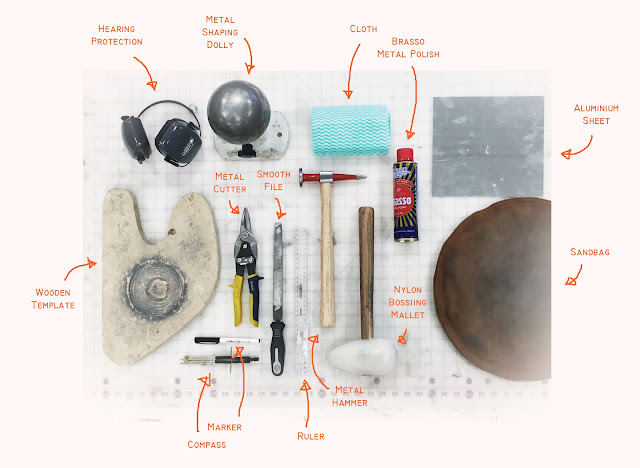
What you need:

Step 1 -
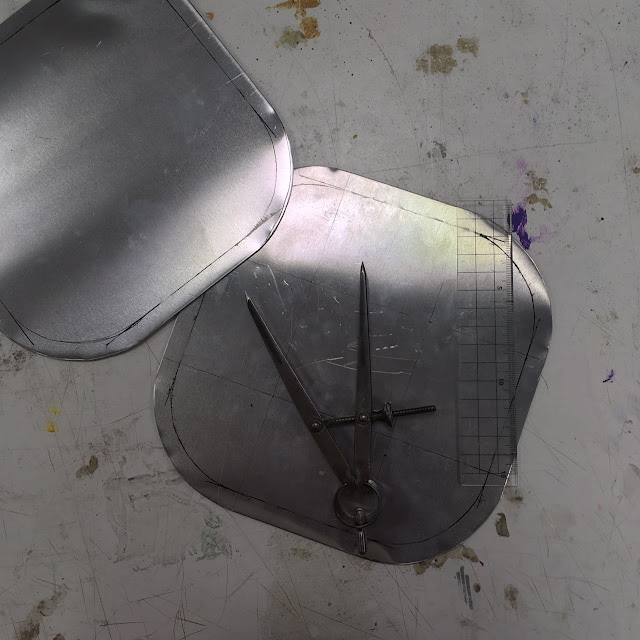
Decide a size of your bowl, prepare an aluminium sheet to draw on. Remember it will shrink as you shape the form.
Step 2 -
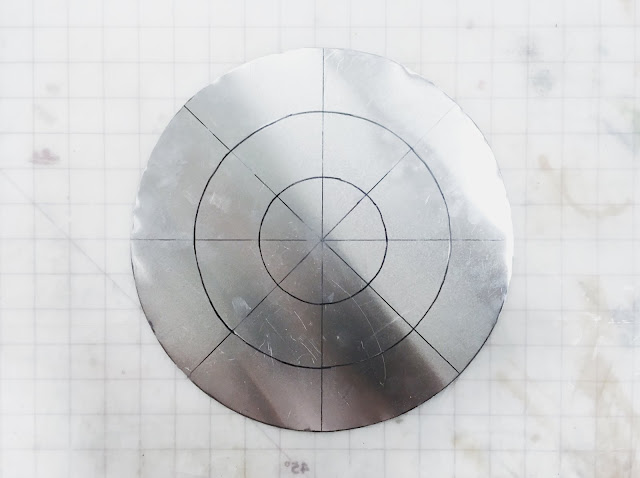
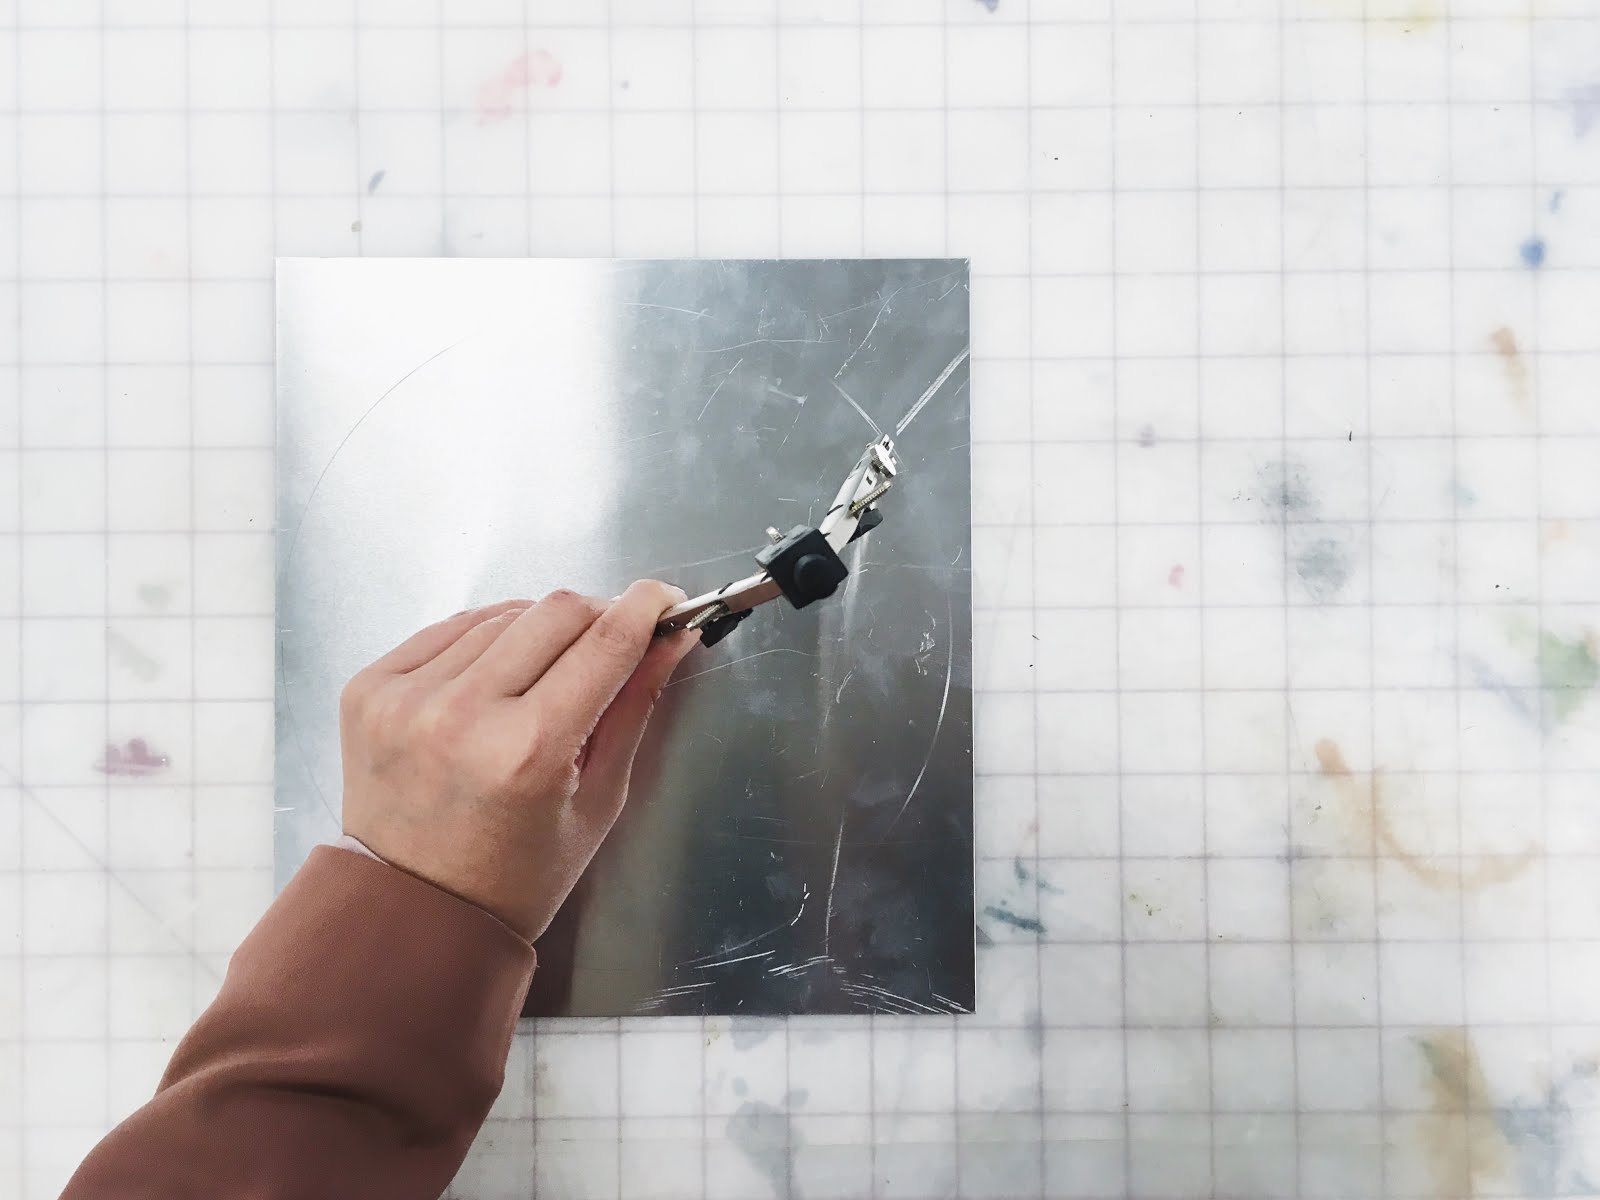
This example is 250mm x 250mm. Measure diameter 25cm with ruler, draw a circle with compass.

Step 3 -
Trim the circle shape with a metal cutter.

Step 4 -
Smooth the edge with a smooth file.

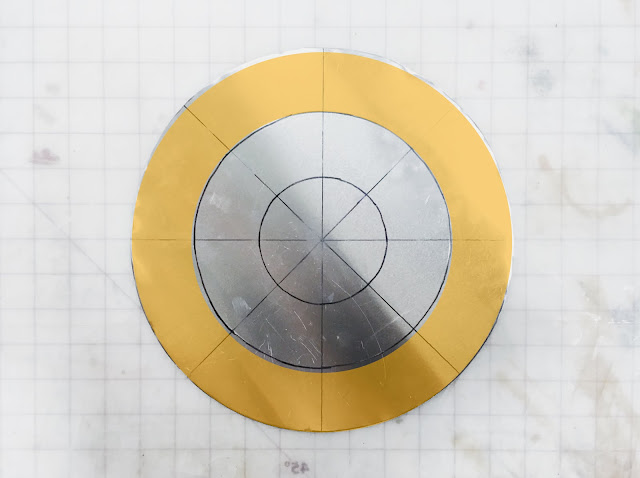
Step 5 -
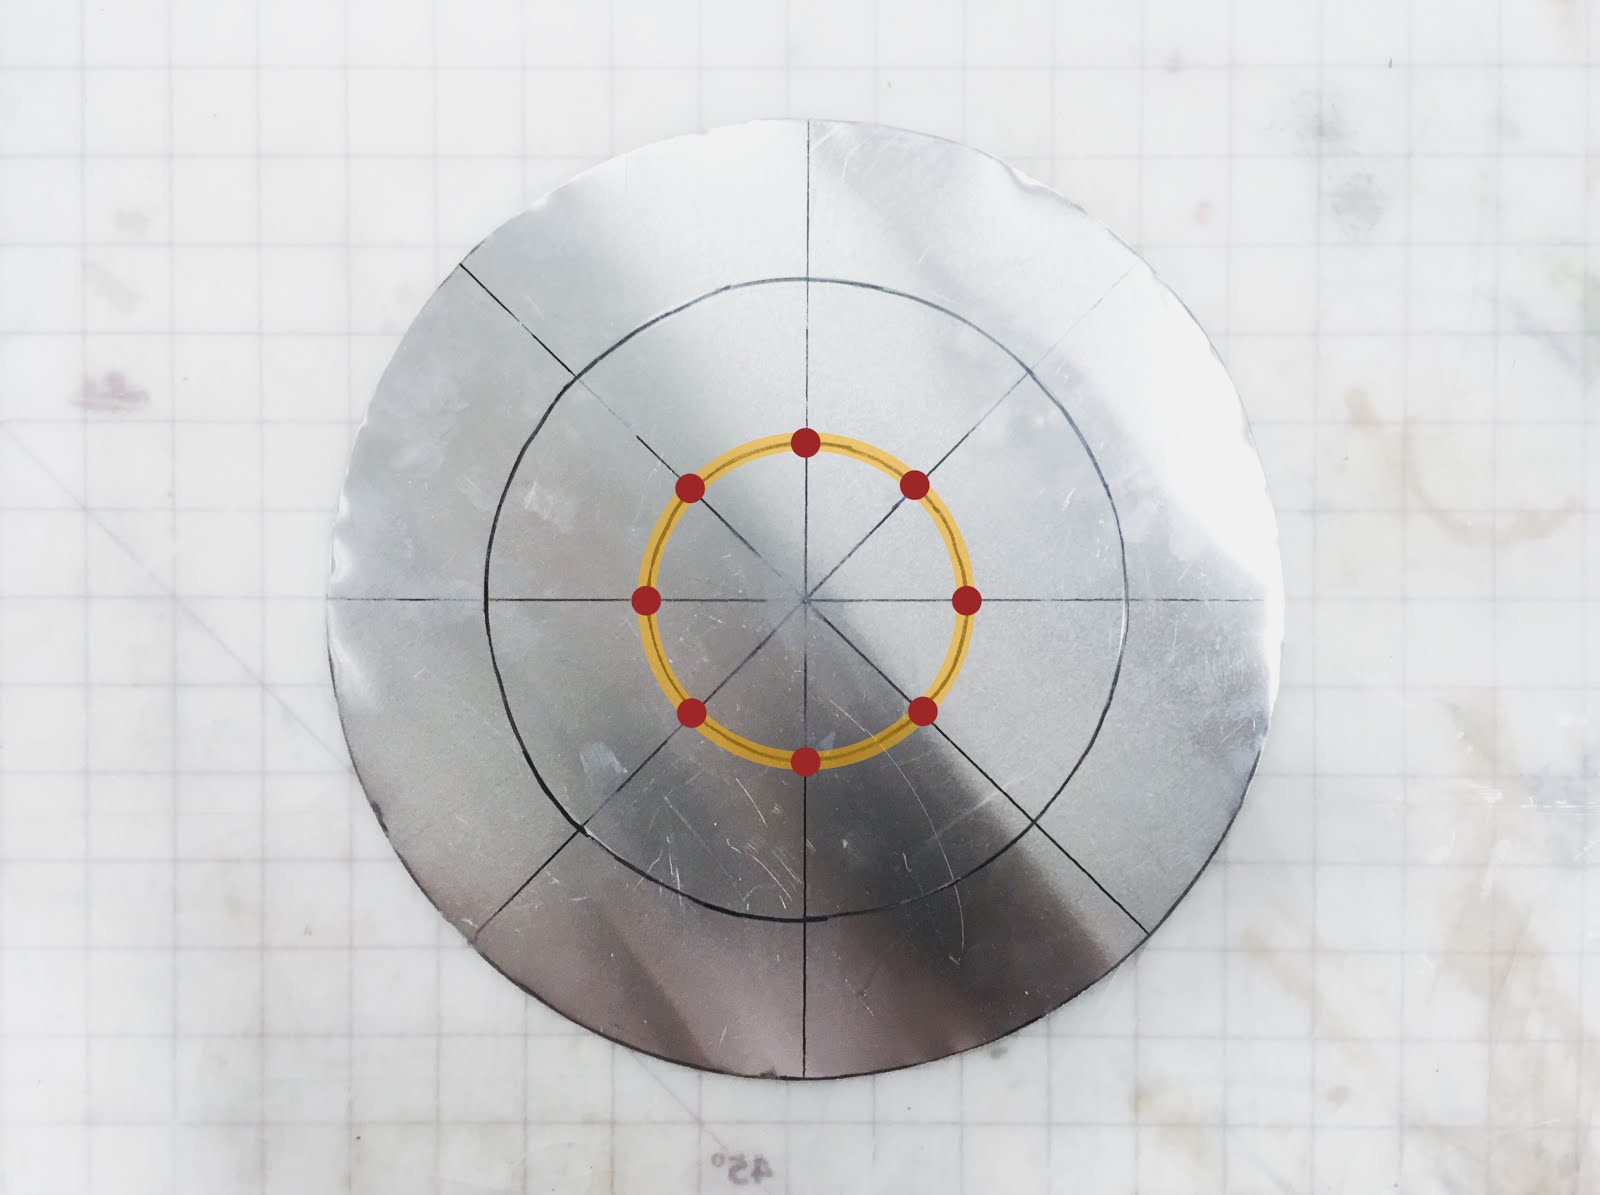
Draw vertical, horizontal, and diagonal diameters to assist measuring. Draw two circles at 1/3 and 2/3 distance, in this case each circle around 8.3cm away from the next. This is to indicate where to shrink and stretch, as explained later.

[SHAPING FORM - SHRINK AND STRETCH]
Making a bowl is all about shrink and stretch. You will get a perfect bowl after repeating this process a few times.
Step 0 -
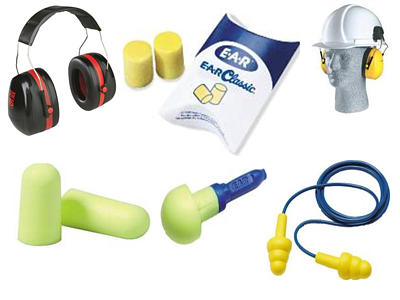
Before you move on to any metal shaping process, remember to put on hearing protection!
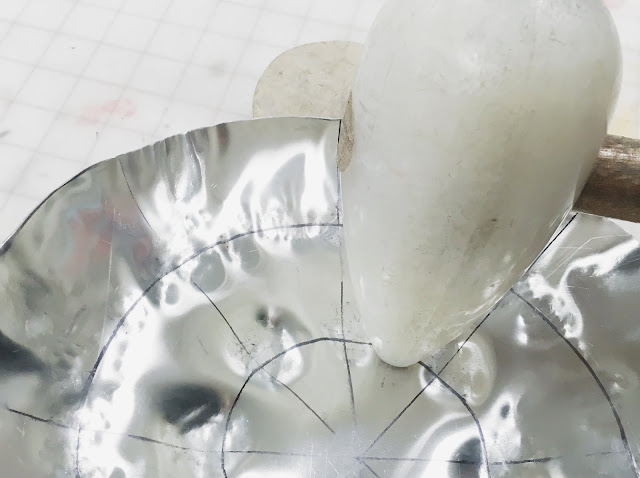
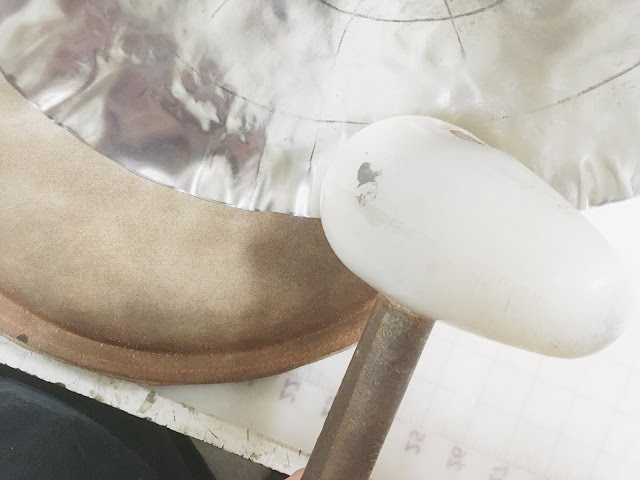
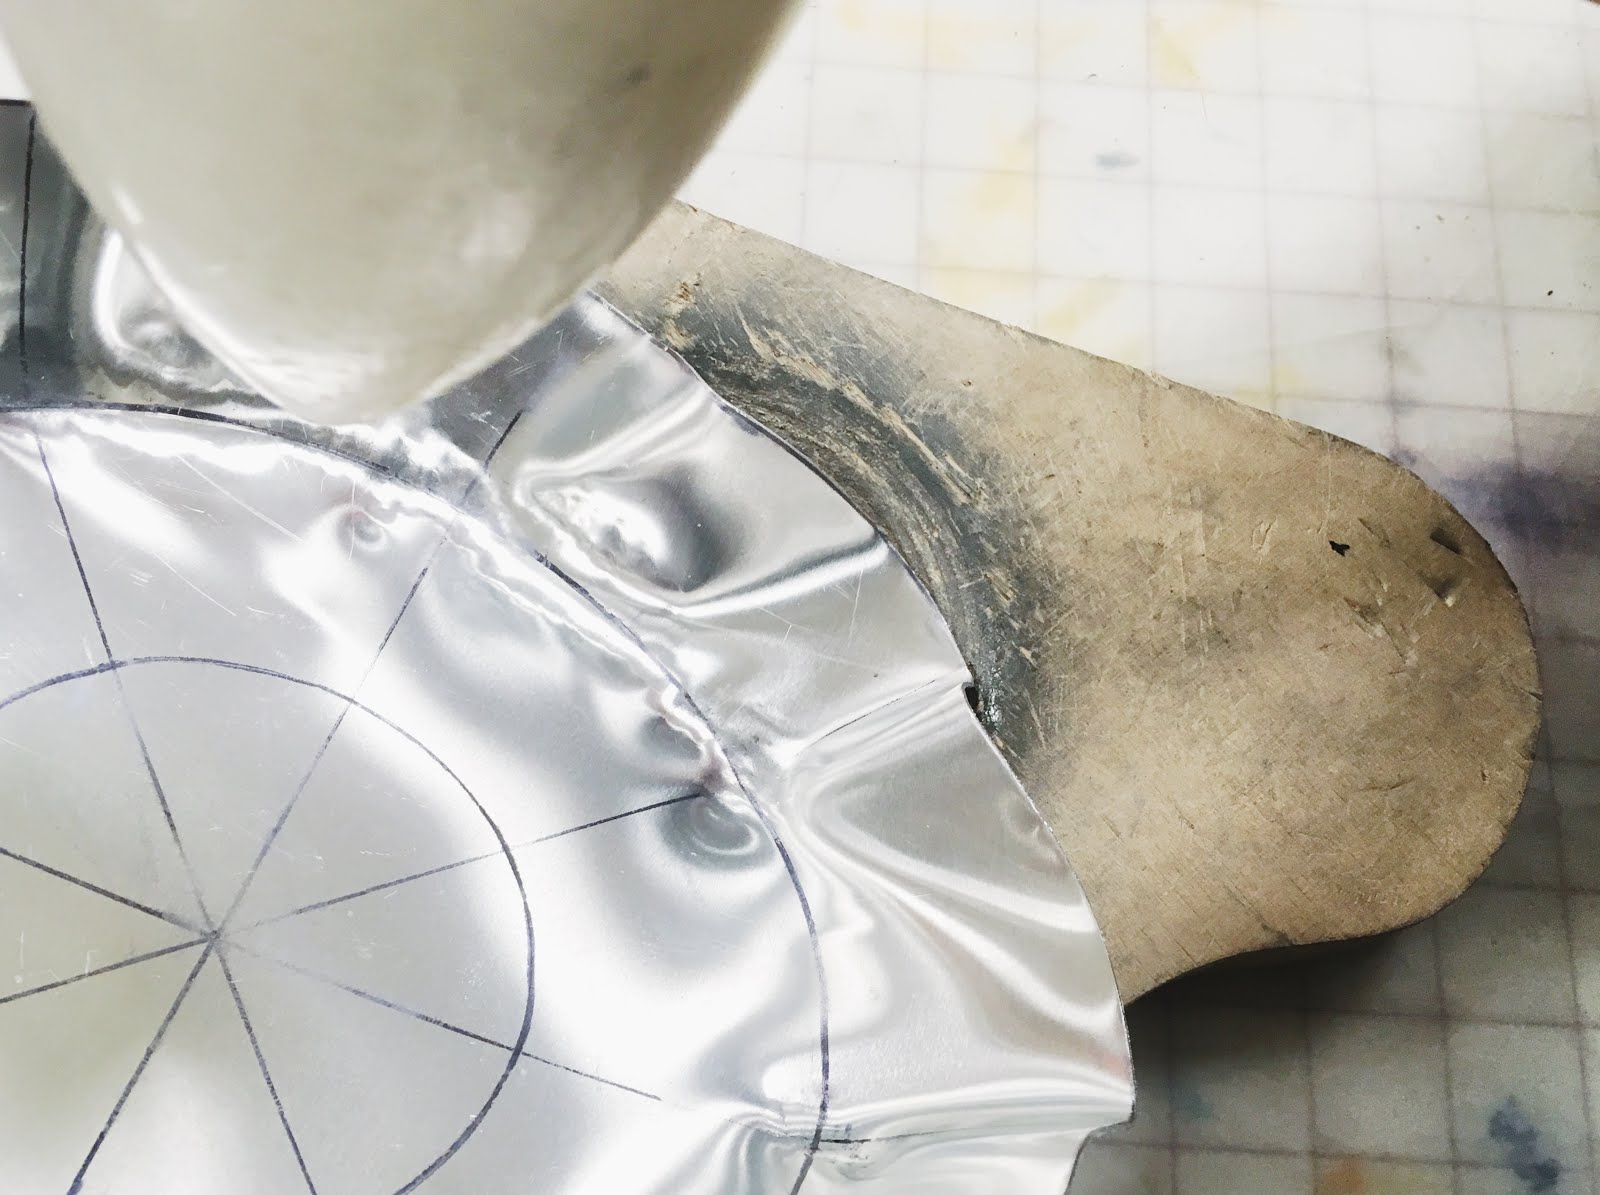
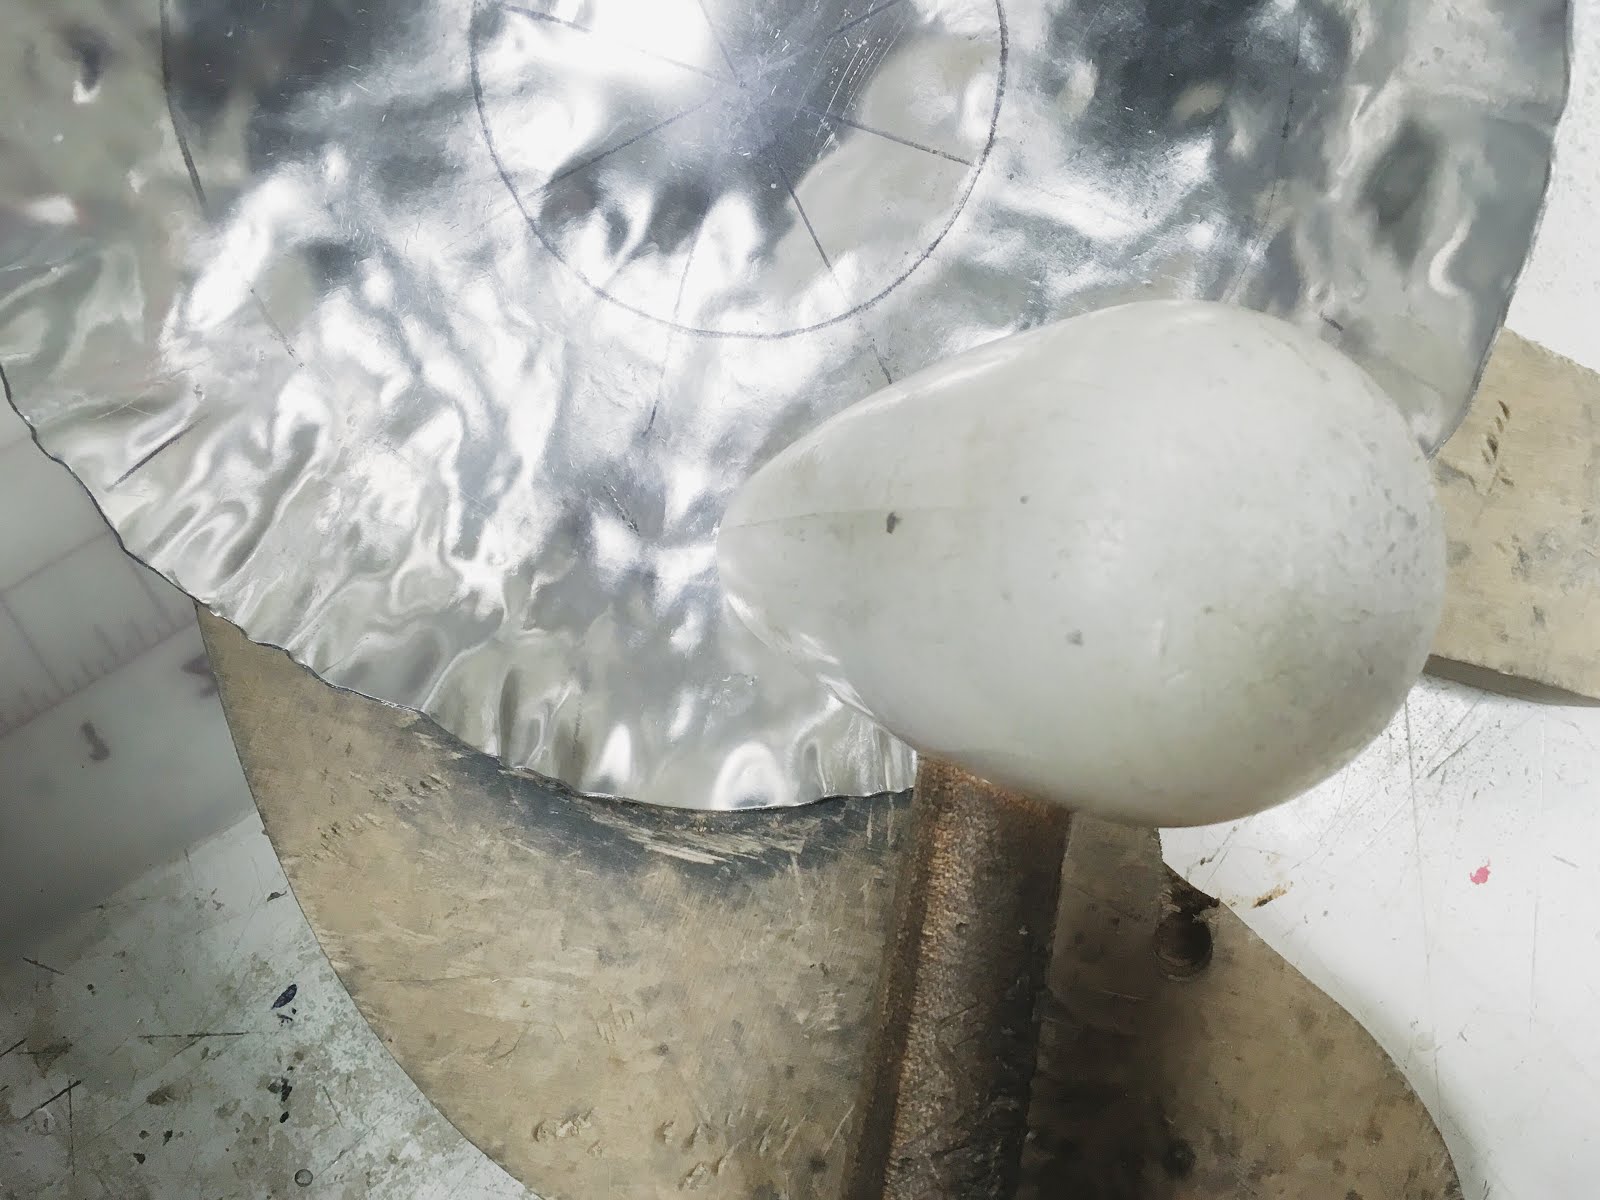
Step 1 - SHRINK
Start with the outer circle, punch with the sharp end of a nylon bossing mallet on a wooden template to shrink.

First punches on the 8 intersection points to form an overall shape, then all the way along the circle.


Remember to hold at an angle, which will help form a smooth curve.


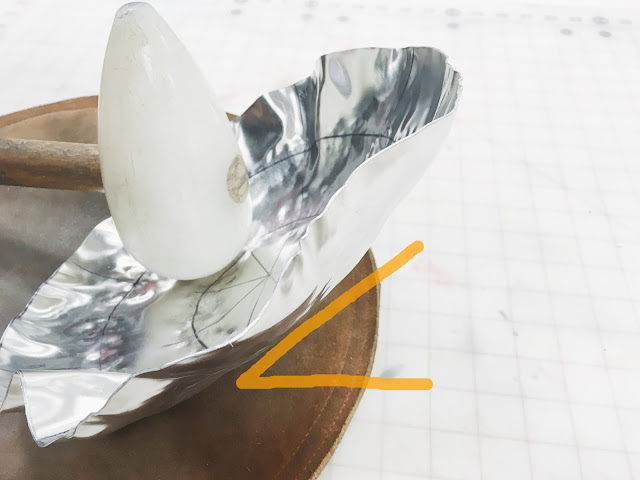
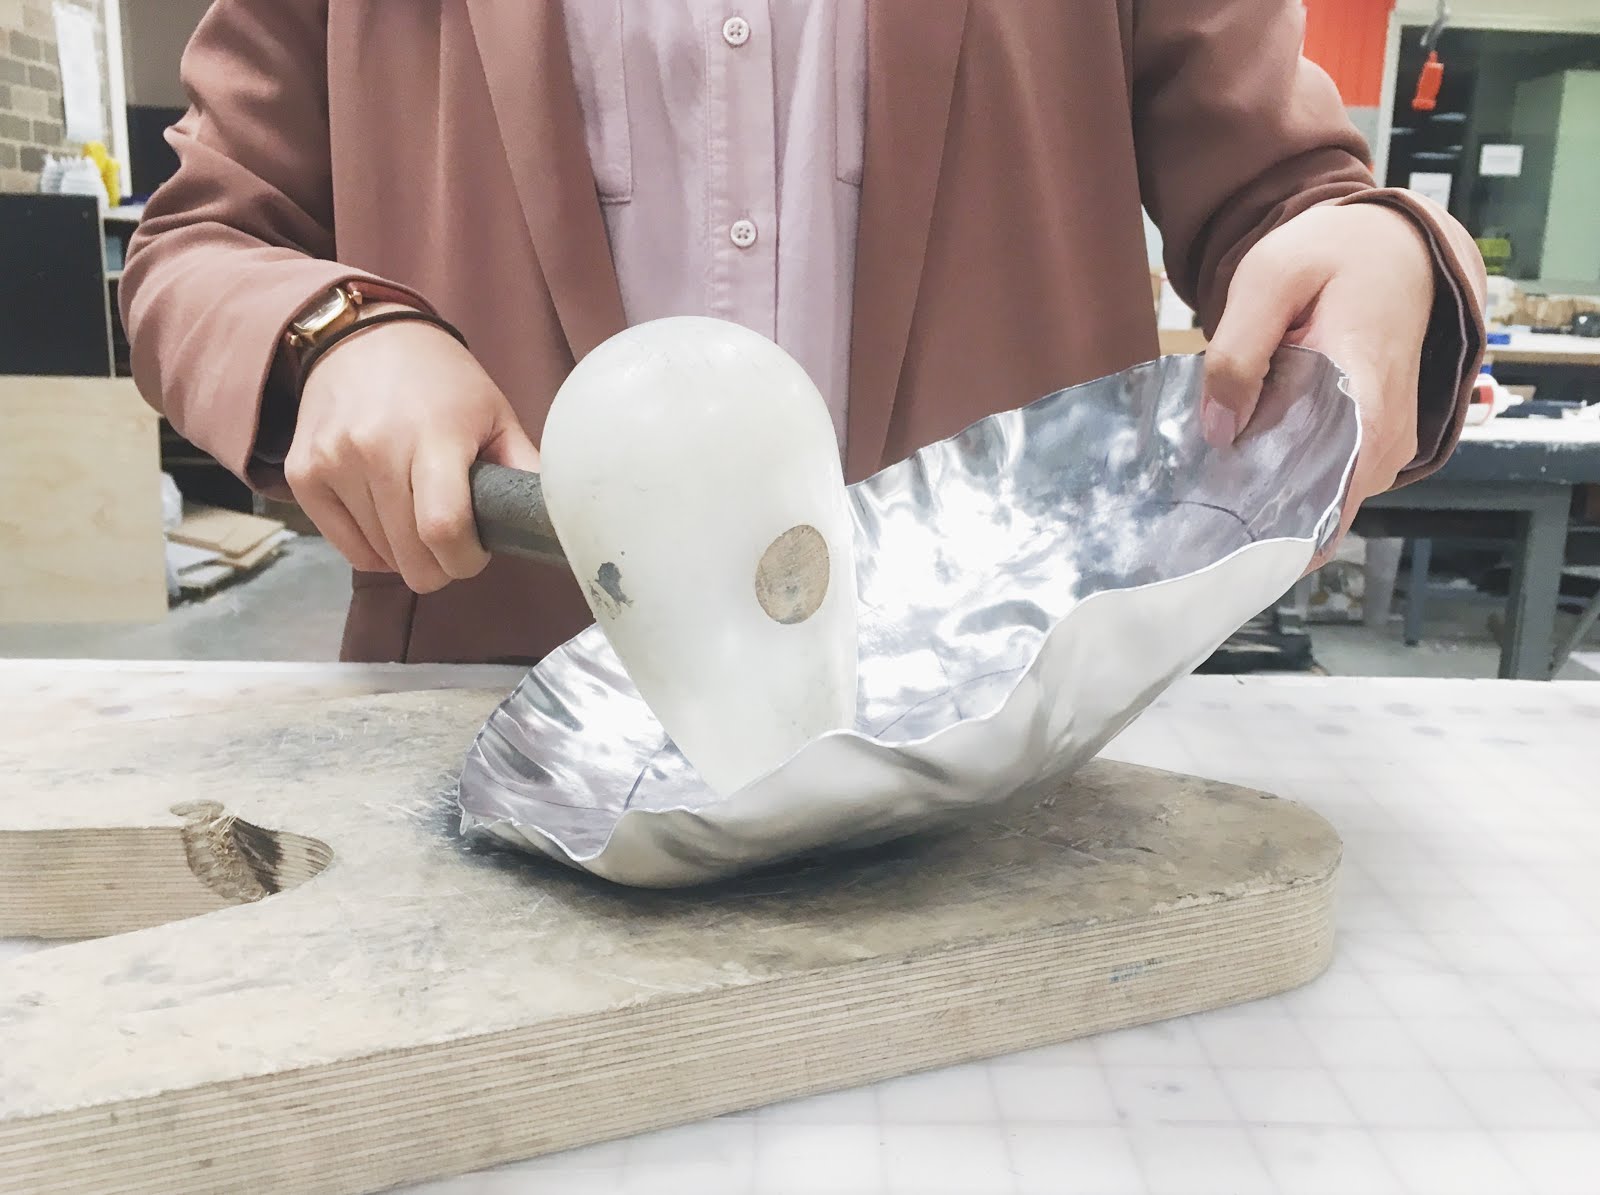
Step 2 - STRETCH
Stretch between the outer circle and the edge. Punch with the round end of a nylon bossing mallet on a sandbag to stretch.


(This demonstration uses a wooden template instead of sandbag, please do not follow!)
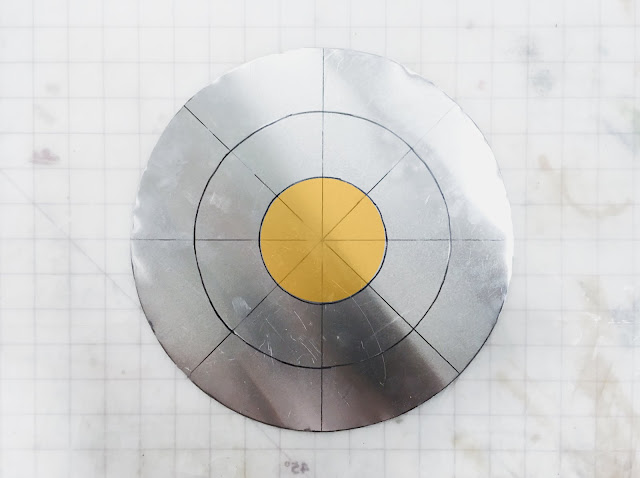
Step 3 - SHRINK
Move towards the inner circle, with the sharp end of nylon bossing mallet and wooden template, punch on the 8 intersection points then all the way along the circle.


Step 4 - STRETCH
Between inner circle and outer circle, punch with the round end of nylon bossing mallet on sandbag to stretch.

Again, remember to hold up at an angle.

Step 5 - STRETCH
At this stage the basic bowl form should be formed. The last area to work on is the center. Use the round end of nylon bossing mallet, punch on sandbag to slightly stretch.

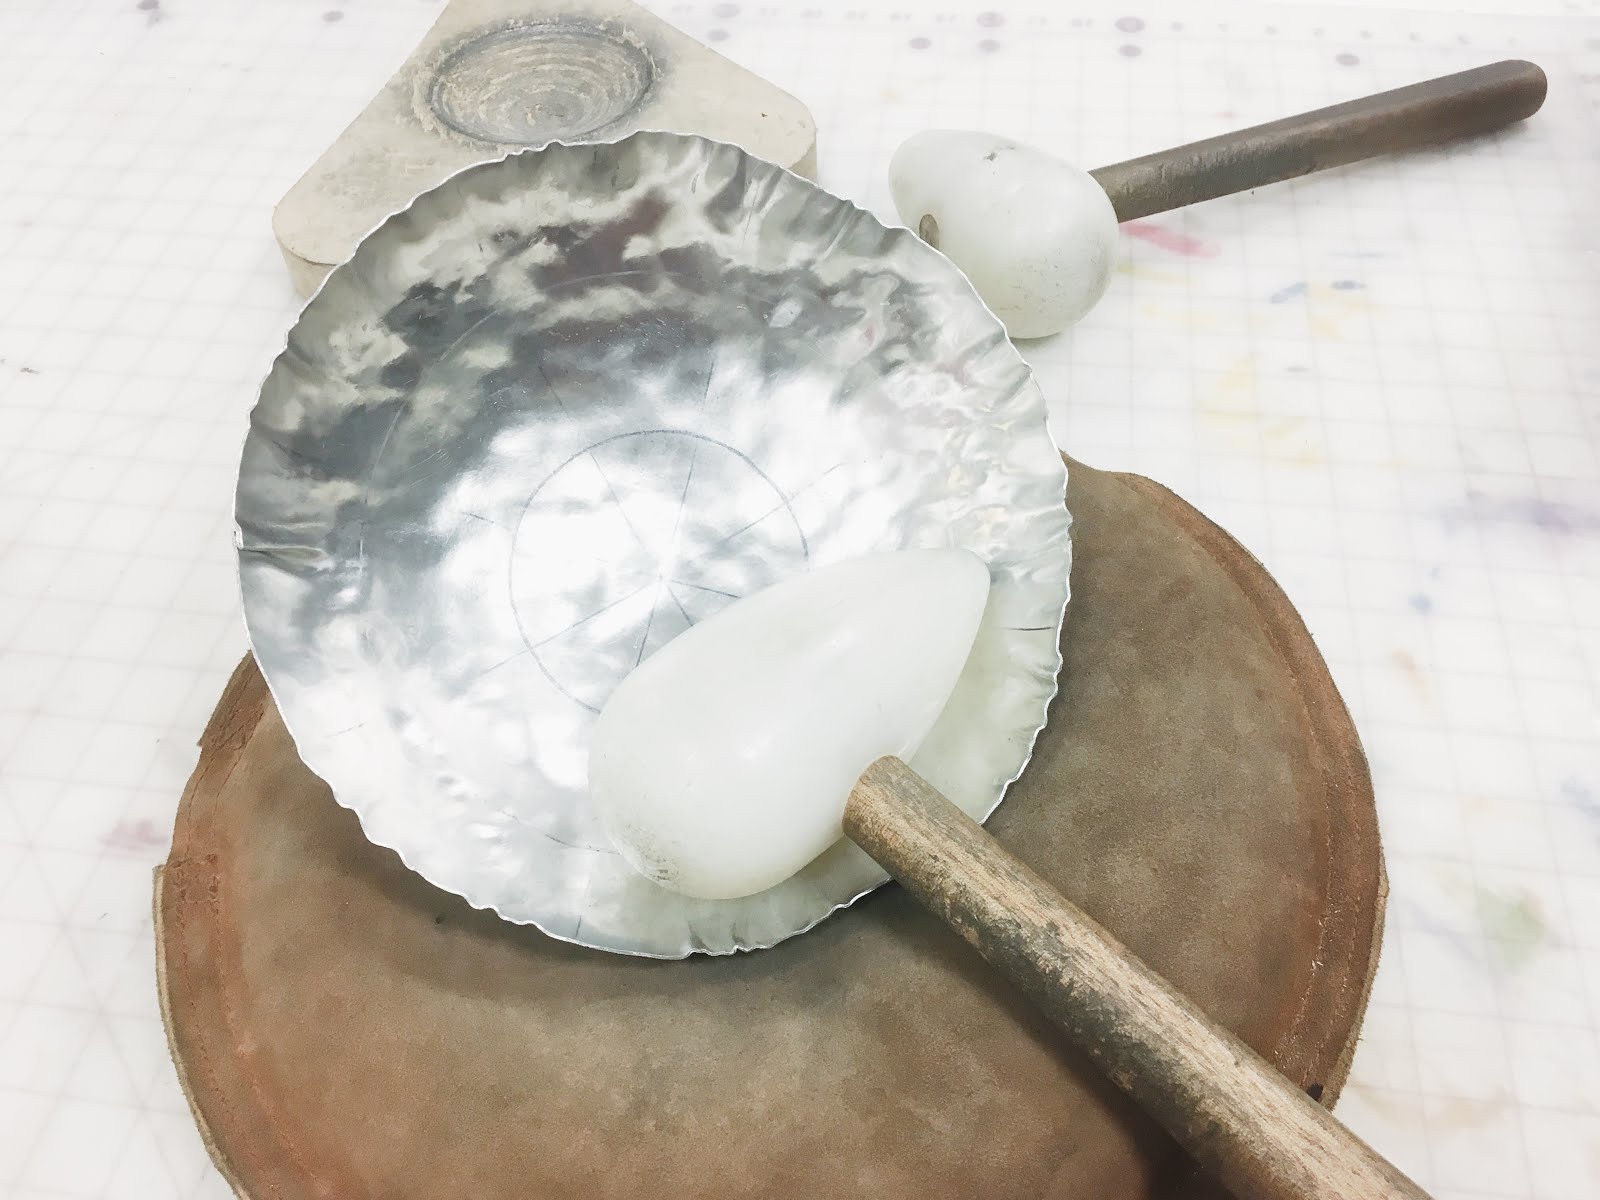
Step 6 -
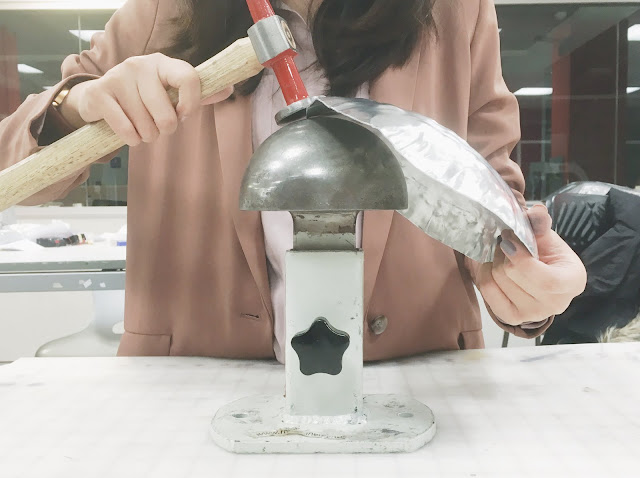
After shrinking and stretching, some folds are formed at the edge. Use a metal hammer and gently hit on mushroom stake (metal shaping dolly) to flatten the folds.

--------------------------------------------------------------------------------------------
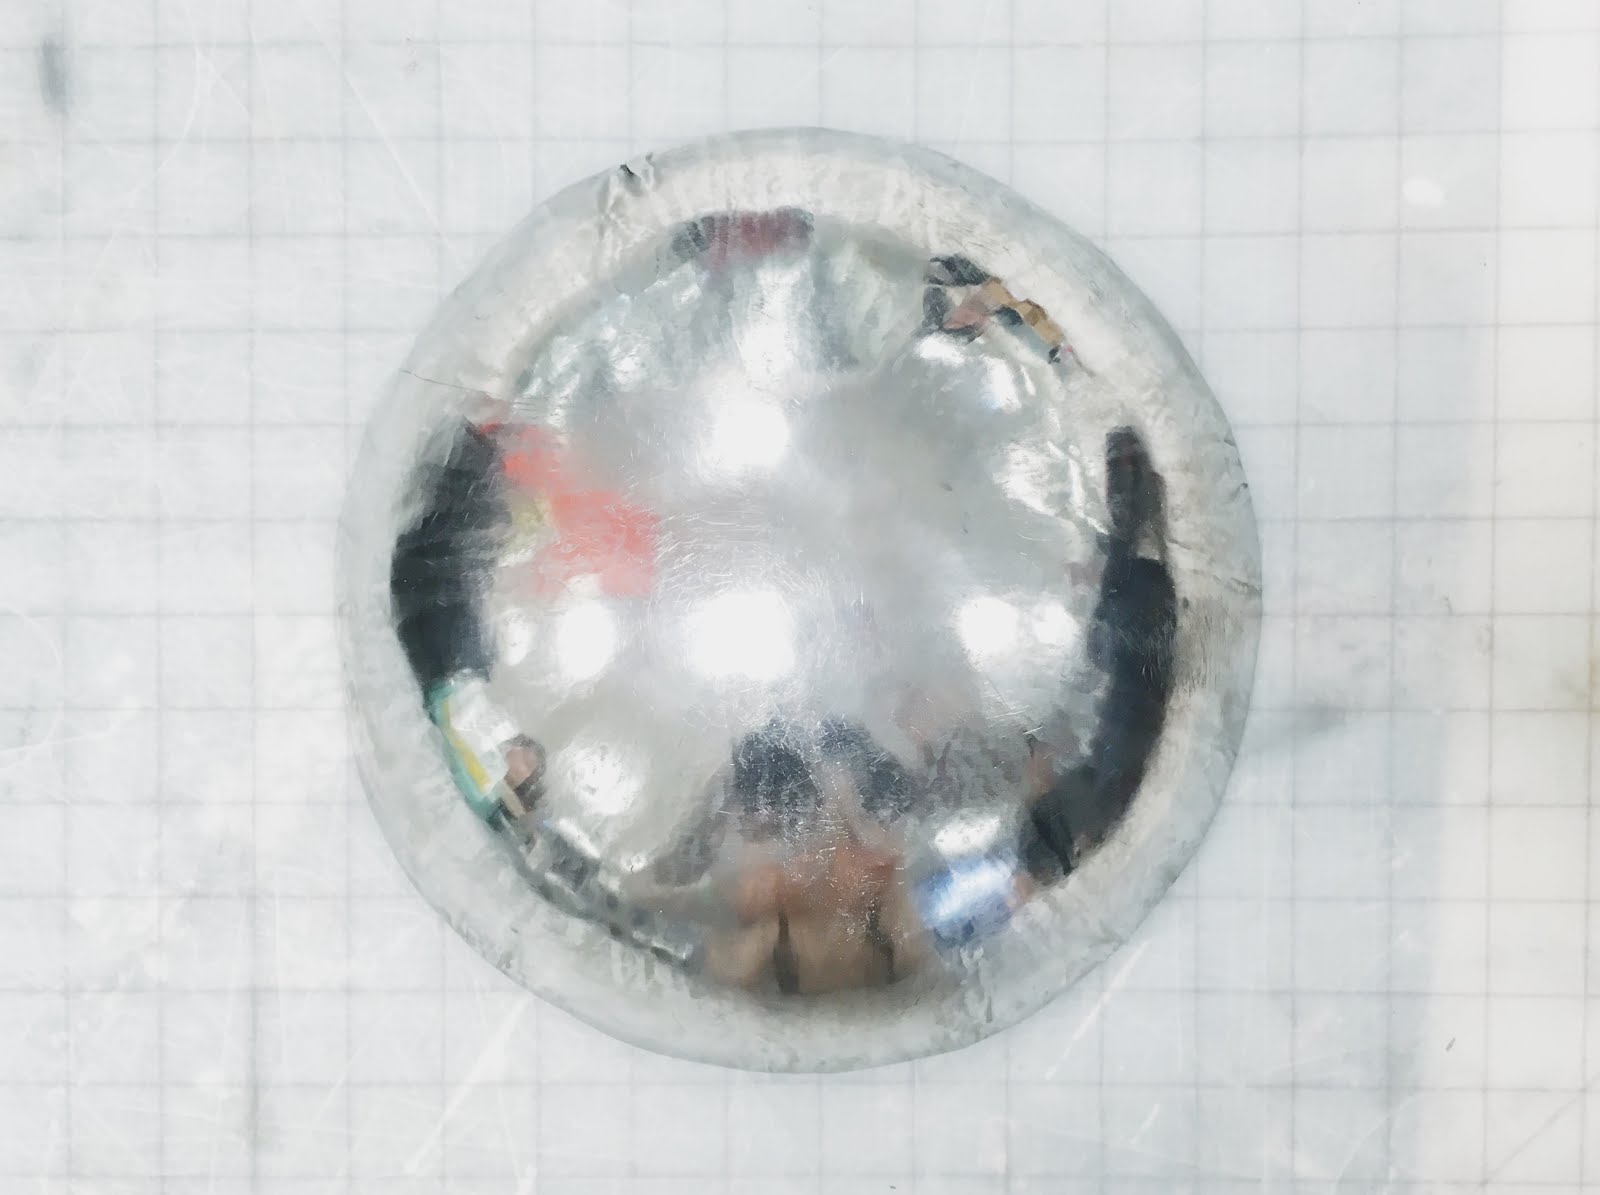
Repeat previous steps - shrink and stretch a few times until you get the curvature you want.


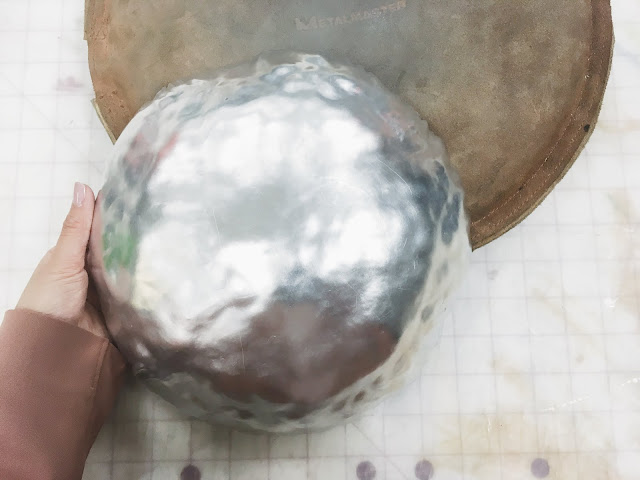
The steps forms a natural curved shape with some obvious bumps and rough texture.


[REFINEMENT]
Step 1 -
Use an english wheel to refine the shape and smooth out the bumps and marks. Place the piece in between the top and bottom rolls. Adjust according to the tightness, either twist the bottom roll downwards, or change to a suitable bottom roll.


Step 2 -
Gently roll the bowl, make sure keep it on the center line every time you roll. Remember not to put too much pressure as it might leave harsh marks.


Step 3 -
Use metal polish (Brasso commonly seen) and a few pieces of cloths to polish the piece. Pour some on a piece of cloth, or apply onto the surface you wish to polish.

Continue to apply Brasso, wipe on both surfaces for a while to clean deeply. Use a clean piece of cloth to wipe away the dirt. This should eventually produce a shiny skin.


FINAL RESULTS


The key to make a beautiful bowl is to keep repeating until it comes out to be the perfect bowl you need!
Hope you enjoyed this tutorial :)
Before you move on to any metal shaping process, remember to put on hearing protection!

Step 1 - SHRINK
Start with the outer circle, punch with the sharp end of a nylon bossing mallet on a wooden template to shrink.

First punches on the 8 intersection points to form an overall shape, then all the way along the circle.


Remember to hold at an angle, which will help form a smooth curve.
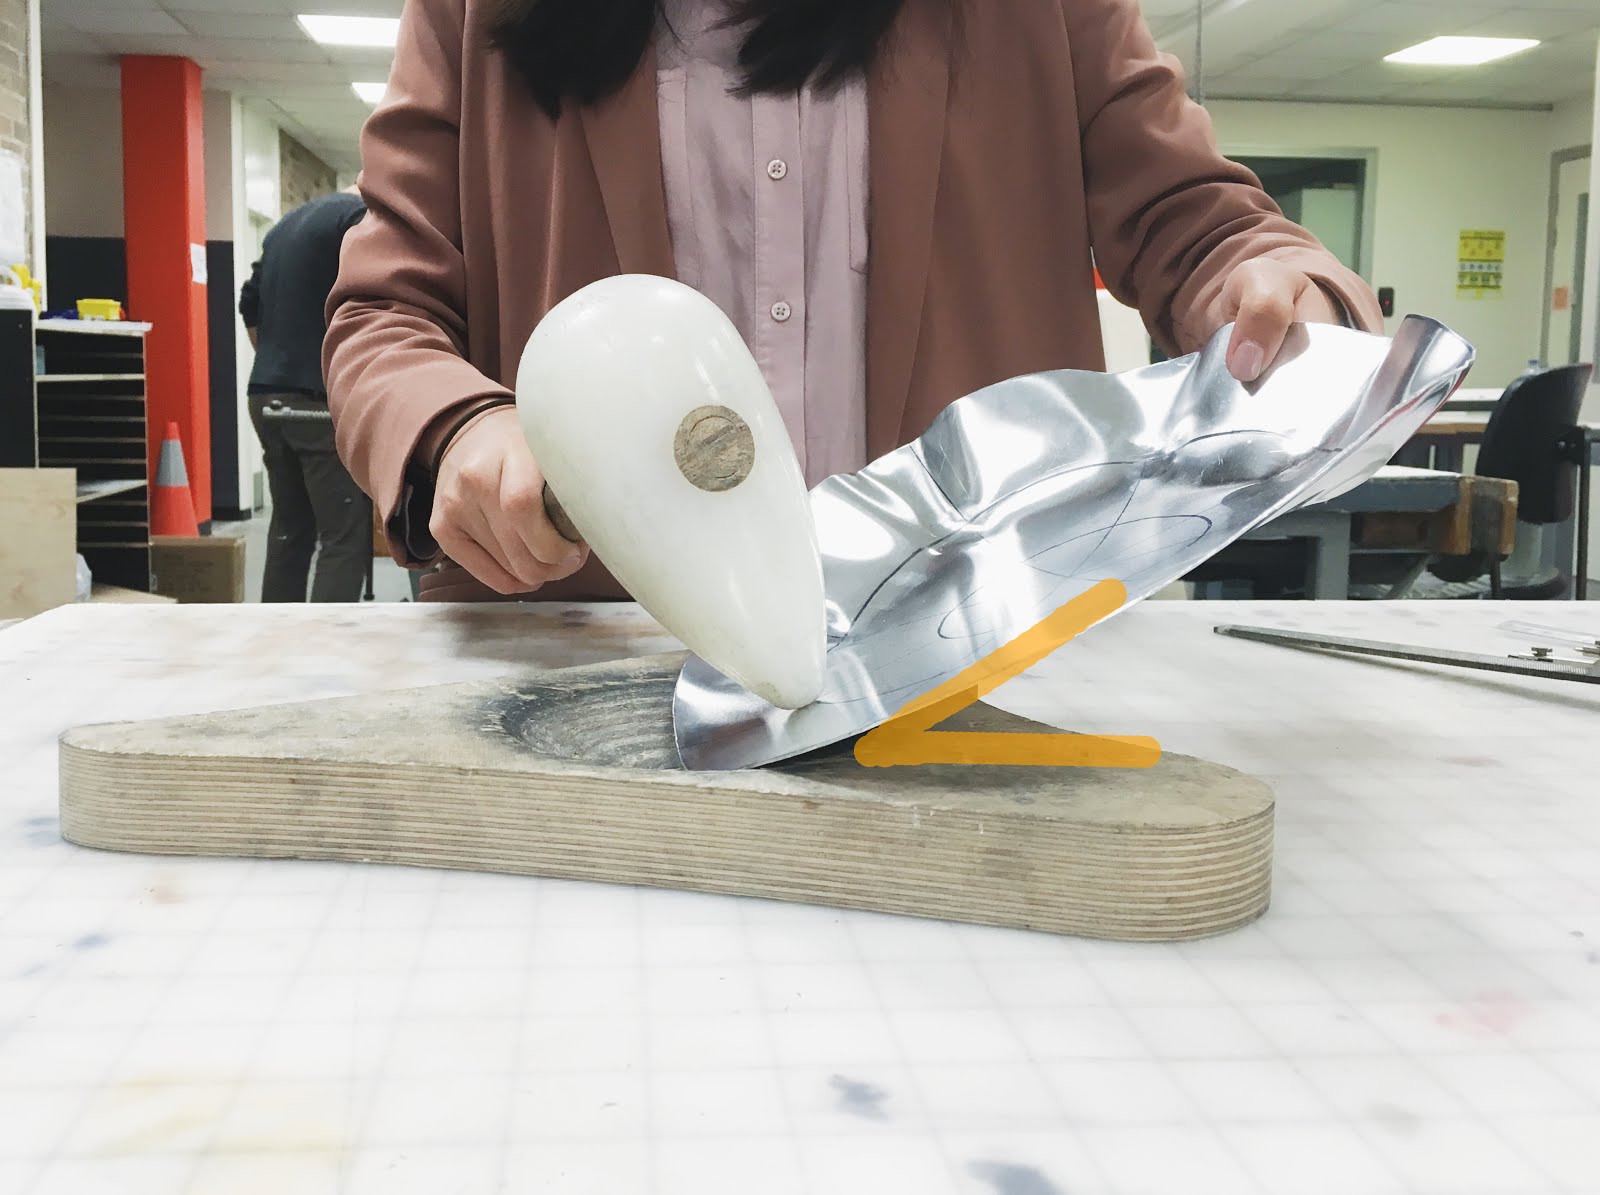
Step 2 - STRETCH
Stretch between the outer circle and the edge. Punch with the round end of a nylon bossing mallet on a sandbag to stretch.


(This demonstration uses a wooden template instead of sandbag, please do not follow!)
Step 3 - SHRINK
Move towards the inner circle, with the sharp end of nylon bossing mallet and wooden template, punch on the 8 intersection points then all the way along the circle.

Step 4 - STRETCH
Between inner circle and outer circle, punch with the round end of nylon bossing mallet on sandbag to stretch.

Again, remember to hold up at an angle.


Step 5 - STRETCH
At this stage the basic bowl form should be formed. The last area to work on is the center. Use the round end of nylon bossing mallet, punch on sandbag to slightly stretch.


Step 6 -
After shrinking and stretching, some folds are formed at the edge. Use a metal hammer and gently hit on mushroom stake (metal shaping dolly) to flatten the folds.


--------------------------------------------------------------------------------------------
Repeat previous steps - shrink and stretch a few times until you get the curvature you want.


The steps forms a natural curved shape with some obvious bumps and rough texture.


[REFINEMENT]
Step 1 -
Use an english wheel to refine the shape and smooth out the bumps and marks. Place the piece in between the top and bottom rolls. Adjust according to the tightness, either twist the bottom roll downwards, or change to a suitable bottom roll.


Step 2 -
Gently roll the bowl, make sure keep it on the center line every time you roll. Remember not to put too much pressure as it might leave harsh marks.


Step 3 -
Use metal polish (Brasso commonly seen) and a few pieces of cloths to polish the piece. Pour some on a piece of cloth, or apply onto the surface you wish to polish.

Continue to apply Brasso, wipe on both surfaces for a while to clean deeply. Use a clean piece of cloth to wipe away the dirt. This should eventually produce a shiny skin.


FINAL RESULTS

The key to make a beautiful bowl is to keep repeating until it comes out to be the perfect bowl you need!
Hope you enjoyed this tutorial :)

Comments
Post a Comment