[WEEK 6-13] FERRARI 250GTO
WORK OF THE WEEKS - FERRARI 250GTO
[WEEK 6]
Last assignment we fabricated a bowl, a torus, a tray and a blister. From that I developed basic metal shaping skills such as shrinking and stretching, forming curved surfaces, forming sharp edges, shaping with templates. With these techniques, I'm ready to work on a more complex metal shaping task.
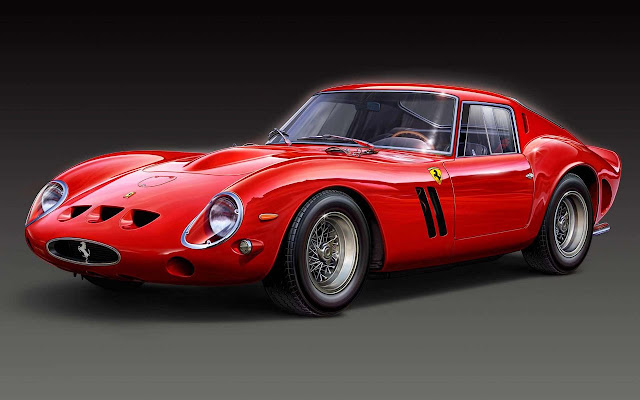
For assignment two we have to model a Ferrari 250 gto (scaled down) in a group of 6. I grouped up with friends from same discipline (Architecture) as we have same schedule and group work experience. This greatly enhances our efficiency and cooperation. Here comes our awesome group members:
Qian Sha http://shaqianbeil0014.blogspot.com.au/
Zhenlei Yu http://zhenleiyubeil0014.blogspot.com
Jiayu Li http://jiayuli5027232.blogspot.com.au/
Shanshan Zhang http://zhangshanshan.blogspot.com.au/
Ruilin Qin http://qinruilinbeil0014.blogspot.com.au/
Qiutong Zhang (me)
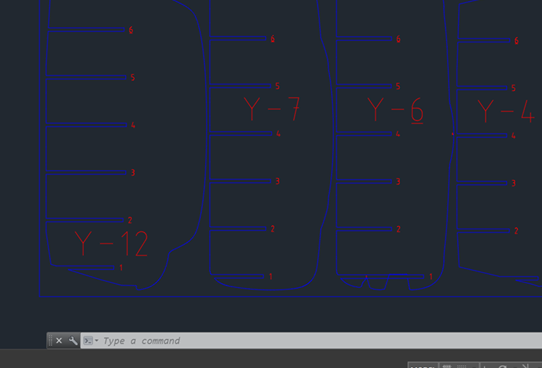
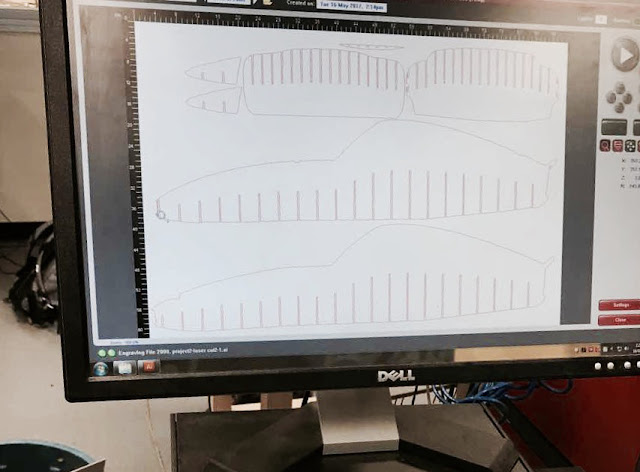
We downloaded and installed 123dMake, then imported the model of Ferrari 250gto downloaded from class blog. We've scaled it down to a much smaller size, created slices horizontally and vertically to form a template, exported into Ai files. Ready to put in laser cutting machine.

[WEEK 7]
Easter break + ANZAC day
We didn't manage to get a spot for laser cutting, so we had to leave it to next week.
[WEEK 8]
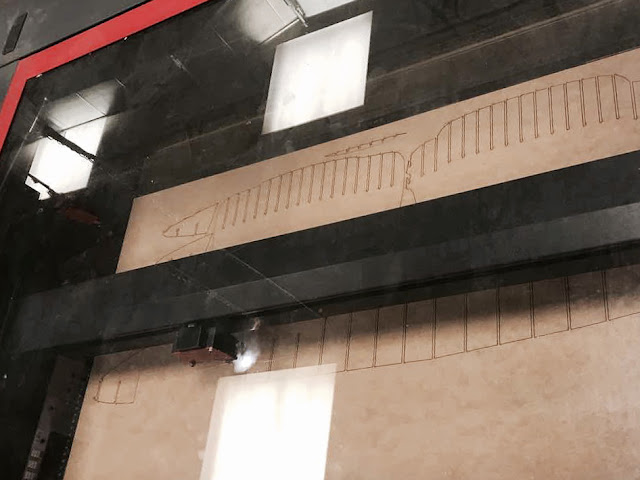
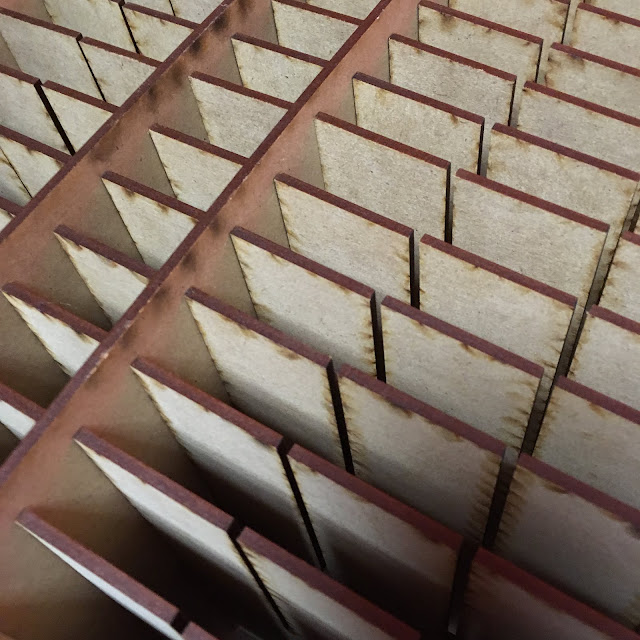
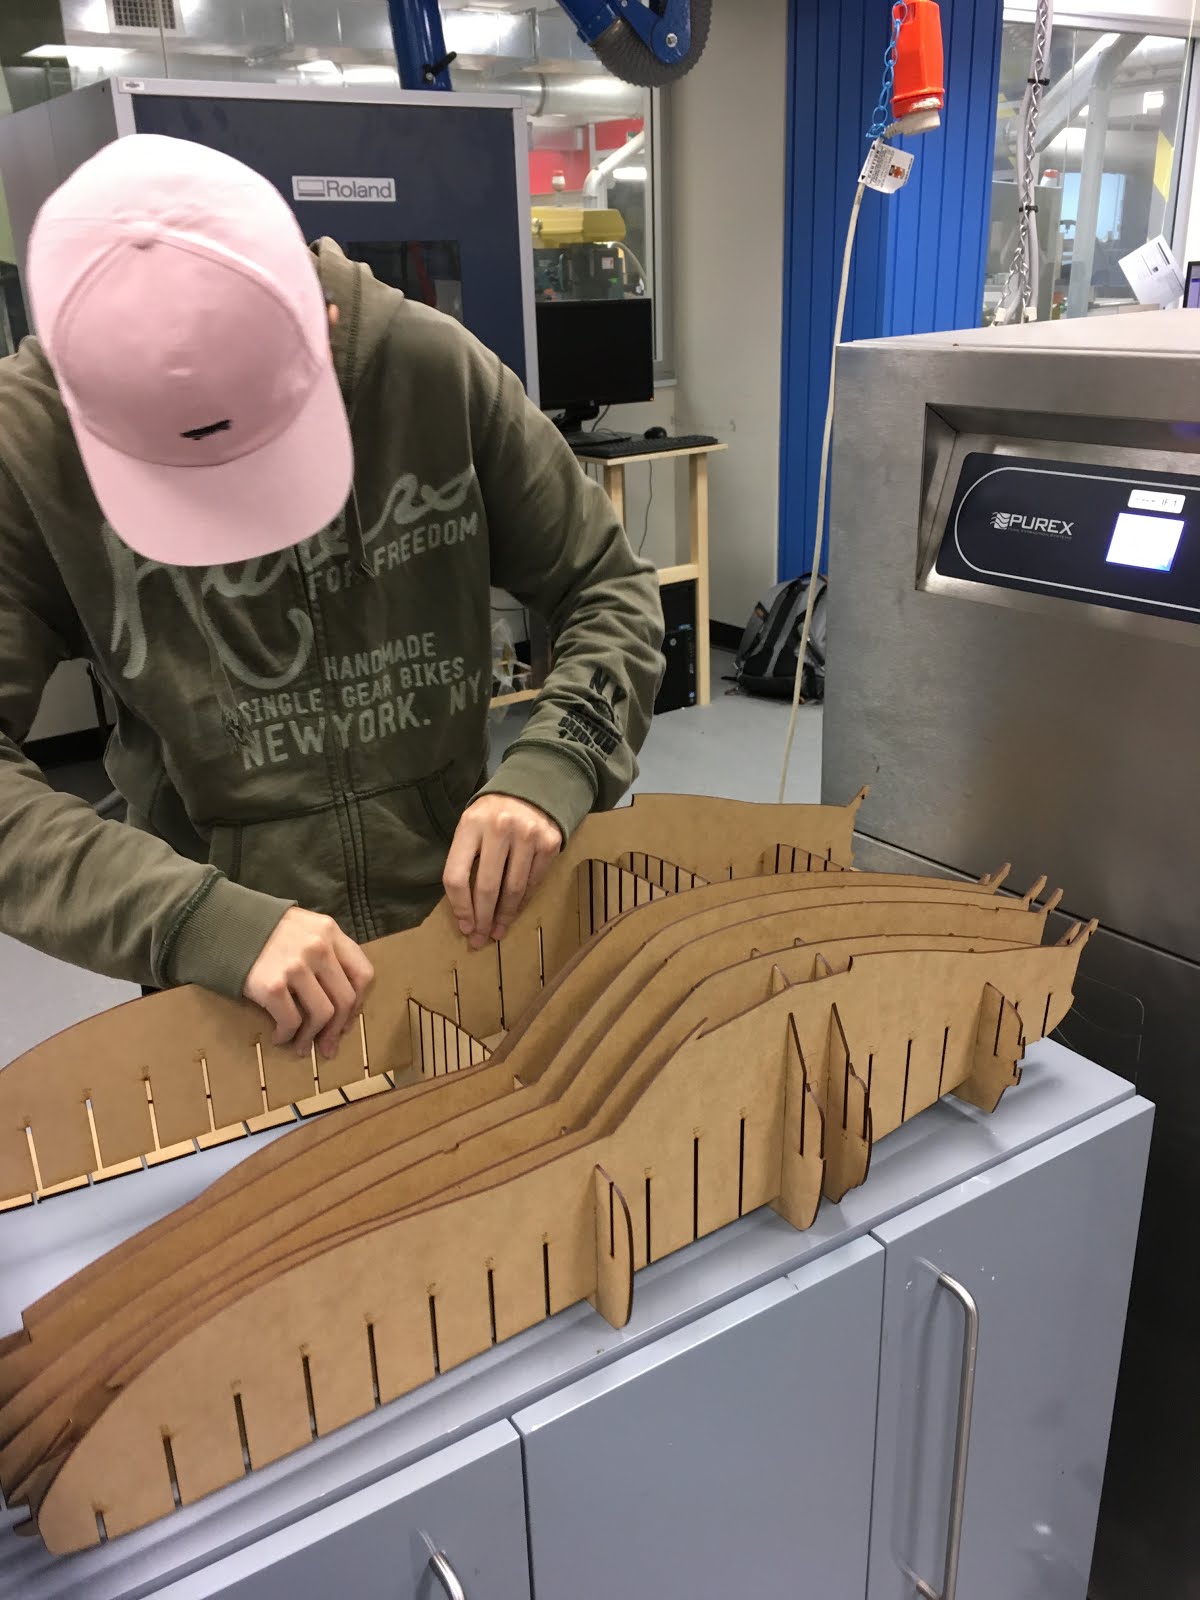
The queue for laser cut machine was such a nightmare. Finally we could start laser cutting the pieces. We chose to use 3mm MDF as it is strong enough and quite easy to handle. It took us another day and workshop was closed. Luckily we were able to cut most of the pieces. Have to finish cutting the rest as soon as possible.
[WEEK 9]
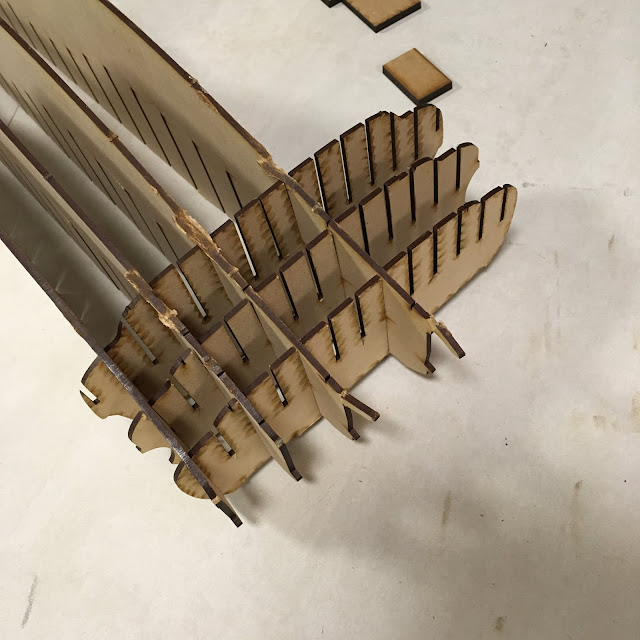
Our group's a bit behind, thus during the week we finished laser cutting all the pieces. We started to assemble the pieces at the beginning of this class. However, it was extremely difficult even with the aid of a wooden hammer.
We've made some really big mistakes. We've discovered that we have incorrectly adjusted the template in 123dMake. The thickness of material is 3mm, however the gaps are only 2.74mm. Also, some pieces are not even the right size! What might've happened was the pieces were accidentally stretched when adjusting Ai files. There is no way we can assemble it, the only option is to re-cut the pieces.
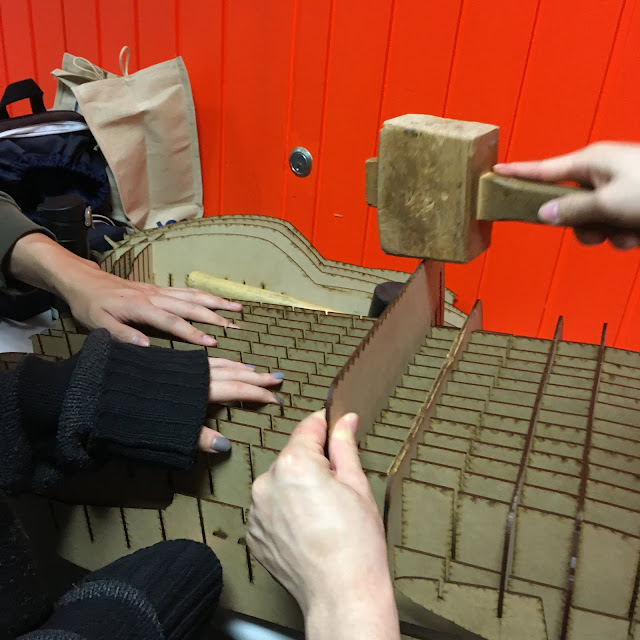
This time we are more careful and fixed all the issues. We've also increased the size as our first model was relatively small comparing to other groups. It would be harder to fabricate.
We should already be shaping the metal pieces, where in fact the template wasn't even ready. To speed up, we decided to split up and multi-task: two people laser cut, two people assemble whatever's been cut (also check if the pieces are correct), two people start drawing shape outline with tracing paper (on another group's template in same size).

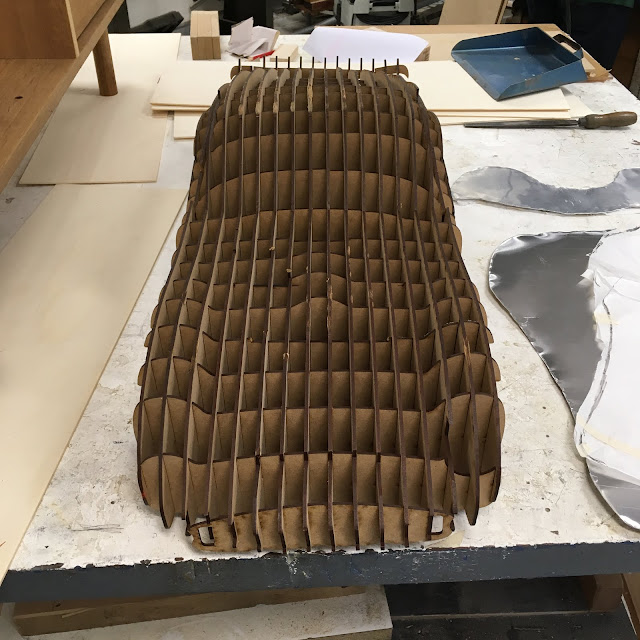
Much easier to assemble this time, it was only towards the end where we had to use hammer to push further. It turned out quick and smooth, we're quite happy with the end results.
[WEEK 11]
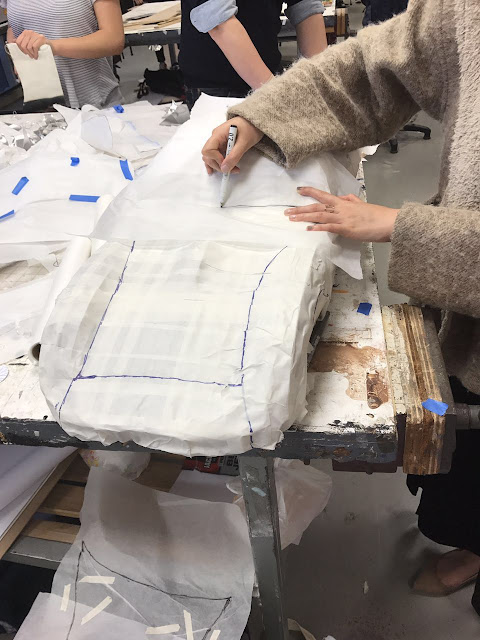
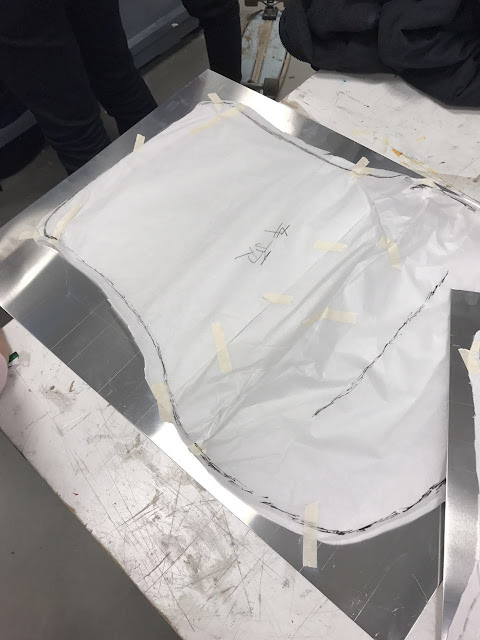
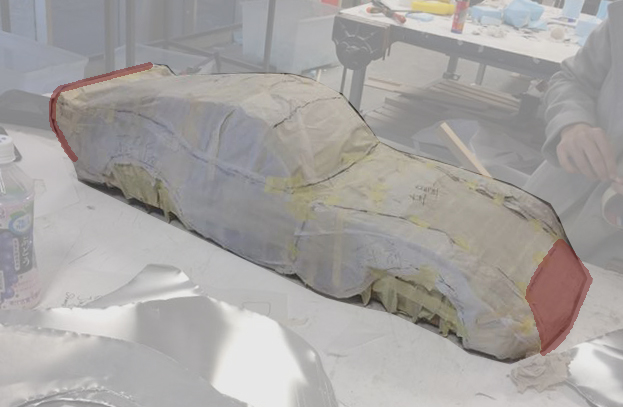
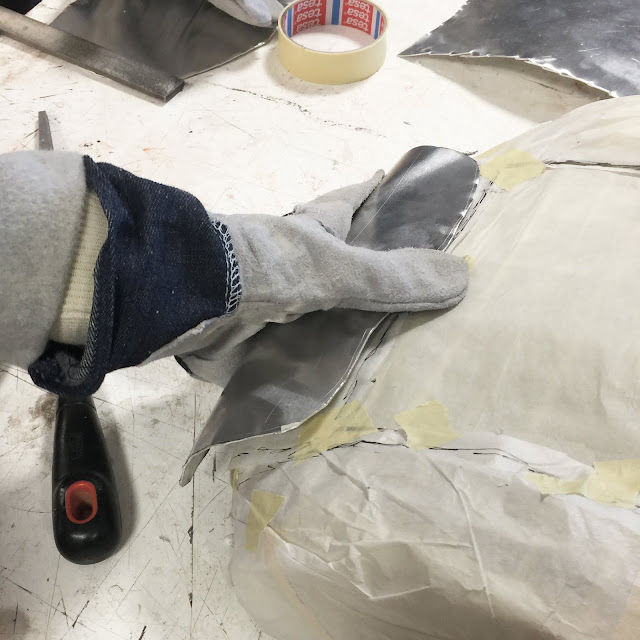
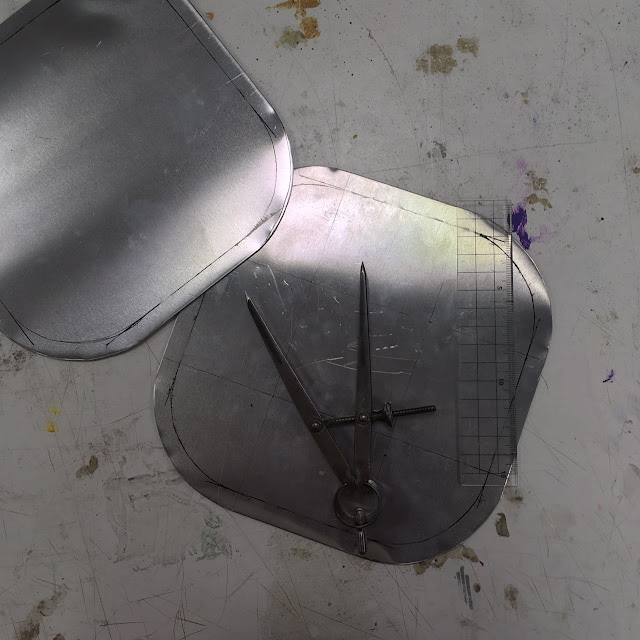
By the beginning of class we already have the shapes drawn on tracing paper ready. We trimmed the pieces slightly bigger, as we expect some shrinking happening later when we shape it into form. We covered them on a sheet of metal and started cutting. It was much harder than expected due to the irregular shape. We used sander to smooth the edges so that it looks refined and won't hurt our hands when holding.
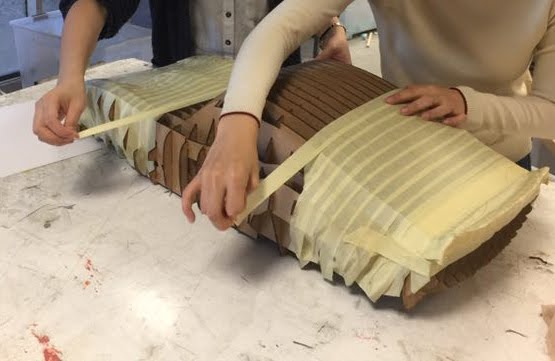
We also wrapped around the car template with masking tape, and then covered it up with the tracing paper pieces. The edges match quite well which implies the shapes are pretty precise. Ready to start metal shaping.
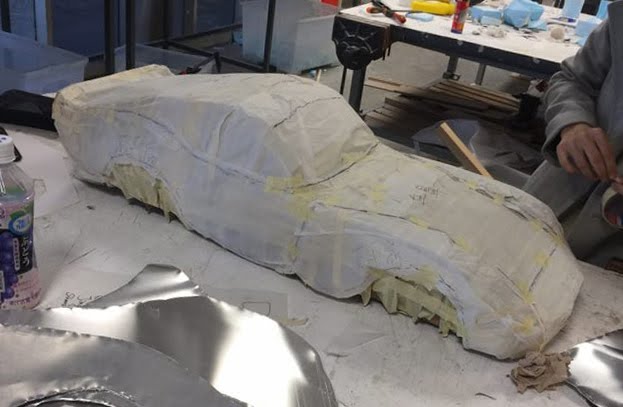
This week has been a big week. We've worked on the pieces together almost every weekdays, and produced some great pieces.


[WEEK 6]
Last assignment we fabricated a bowl, a torus, a tray and a blister. From that I developed basic metal shaping skills such as shrinking and stretching, forming curved surfaces, forming sharp edges, shaping with templates. With these techniques, I'm ready to work on a more complex metal shaping task.
For assignment two we have to model a Ferrari 250 gto (scaled down) in a group of 6. I grouped up with friends from same discipline (Architecture) as we have same schedule and group work experience. This greatly enhances our efficiency and cooperation. Here comes our awesome group members:
Qian Sha http://shaqianbeil0014.blogspot.com.au/
Zhenlei Yu http://zhenleiyubeil0014.blogspot.com
Jiayu Li http://jiayuli5027232.blogspot.com.au/
Shanshan Zhang http://zhangshanshan.blogspot.com.au/
Ruilin Qin http://qinruilinbeil0014.blogspot.com.au/
Qiutong Zhang (me)
We downloaded and installed 123dMake, then imported the model of Ferrari 250gto downloaded from class blog. We've scaled it down to a much smaller size, created slices horizontally and vertically to form a template, exported into Ai files. Ready to put in laser cutting machine.


[WEEK 7]
Easter break + ANZAC day
We didn't manage to get a spot for laser cutting, so we had to leave it to next week.
[WEEK 8]


[WEEK 9]
Our group's a bit behind, thus during the week we finished laser cutting all the pieces. We started to assemble the pieces at the beginning of this class. However, it was extremely difficult even with the aid of a wooden hammer.
We've made some really big mistakes. We've discovered that we have incorrectly adjusted the template in 123dMake. The thickness of material is 3mm, however the gaps are only 2.74mm. Also, some pieces are not even the right size! What might've happened was the pieces were accidentally stretched when adjusting Ai files. There is no way we can assemble it, the only option is to re-cut the pieces.

This time we are more careful and fixed all the issues. We've also increased the size as our first model was relatively small comparing to other groups. It would be harder to fabricate.
We should already be shaping the metal pieces, where in fact the template wasn't even ready. To speed up, we decided to split up and multi-task: two people laser cut, two people assemble whatever's been cut (also check if the pieces are correct), two people start drawing shape outline with tracing paper (on another group's template in same size).

Much easier to assemble this time, it was only towards the end where we had to use hammer to push further. It turned out quick and smooth, we're quite happy with the end results.


[WEEK 11]
By the beginning of class we already have the shapes drawn on tracing paper ready. We trimmed the pieces slightly bigger, as we expect some shrinking happening later when we shape it into form. We covered them on a sheet of metal and started cutting. It was much harder than expected due to the irregular shape. We used sander to smooth the edges so that it looks refined and won't hurt our hands when holding.

We also wrapped around the car template with masking tape, and then covered it up with the tracing paper pieces. The edges match quite well which implies the shapes are pretty precise. Ready to start metal shaping.


I'm responsible of car head and car rear. The main challenges are:
1 - sharp folds
2 - car-lights
3 - joint with car roof
[WEEK 12]
1 - sharp folds
2 - car-lights
3 - joint with car roof

[WEEK 12]
This week has been a big week. We've worked on the pieces together almost every weekdays, and produced some great pieces.
Car head -
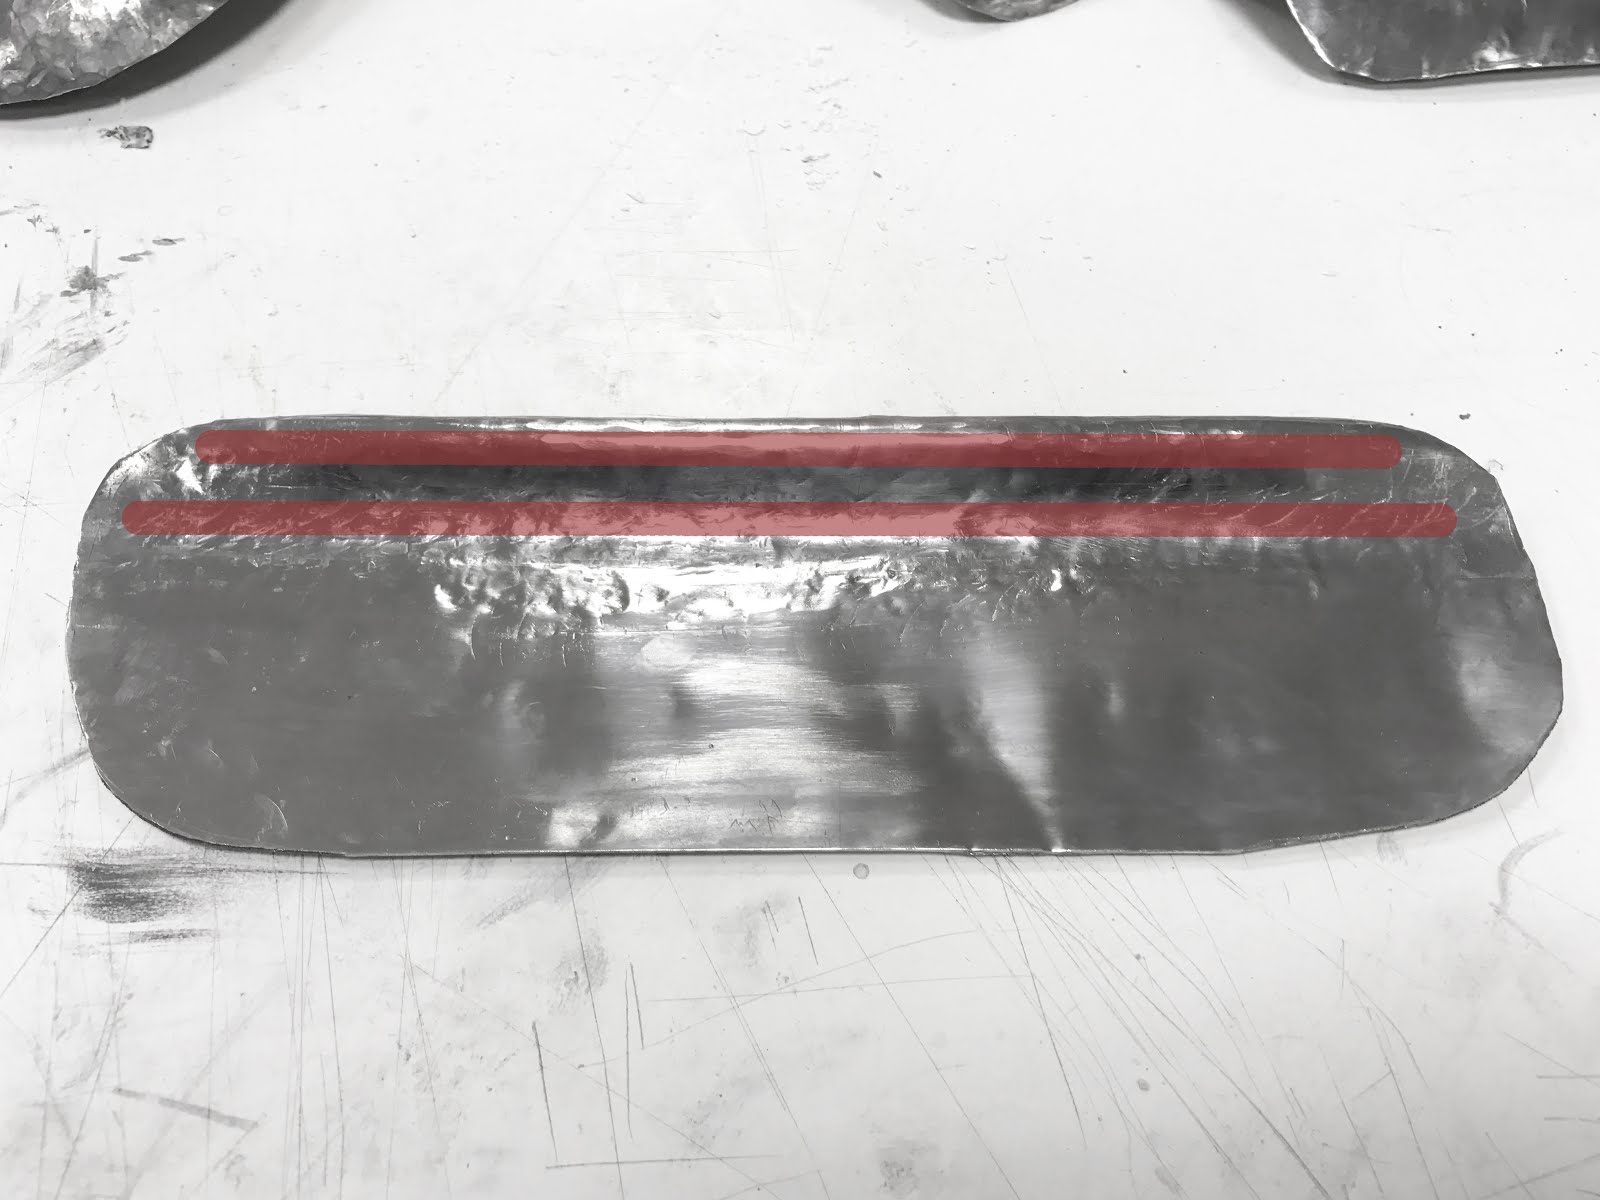
I marked lines where the piece should 'fold'. There are two sharp folds in this piece.
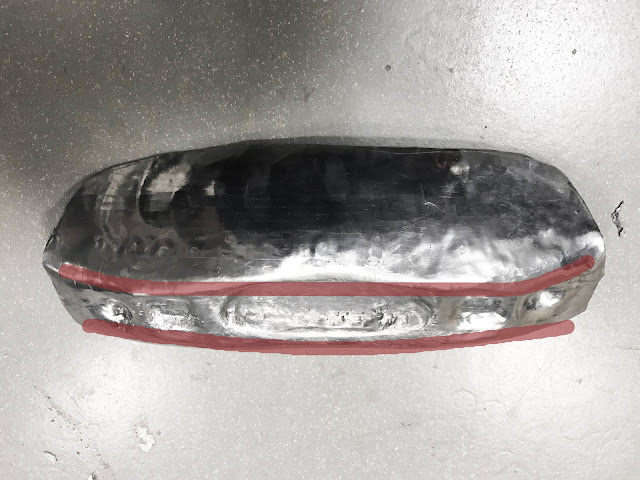

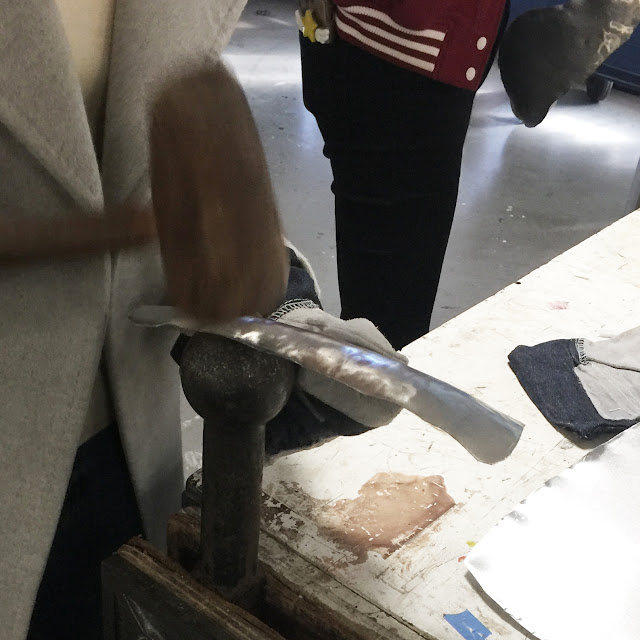
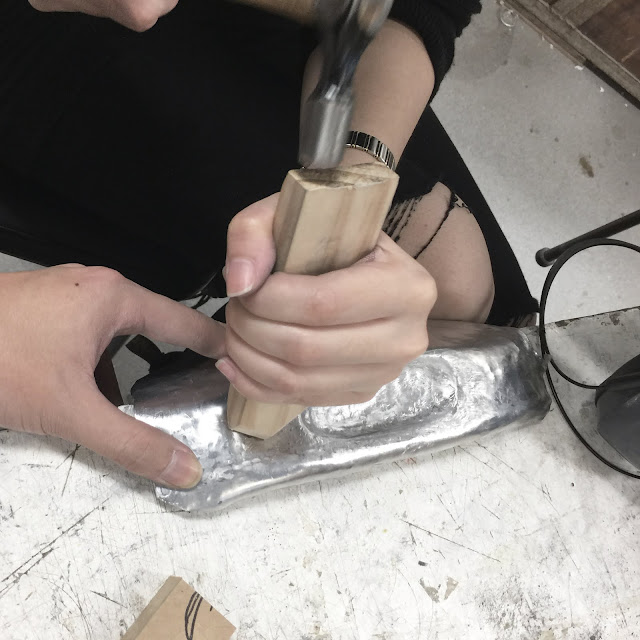
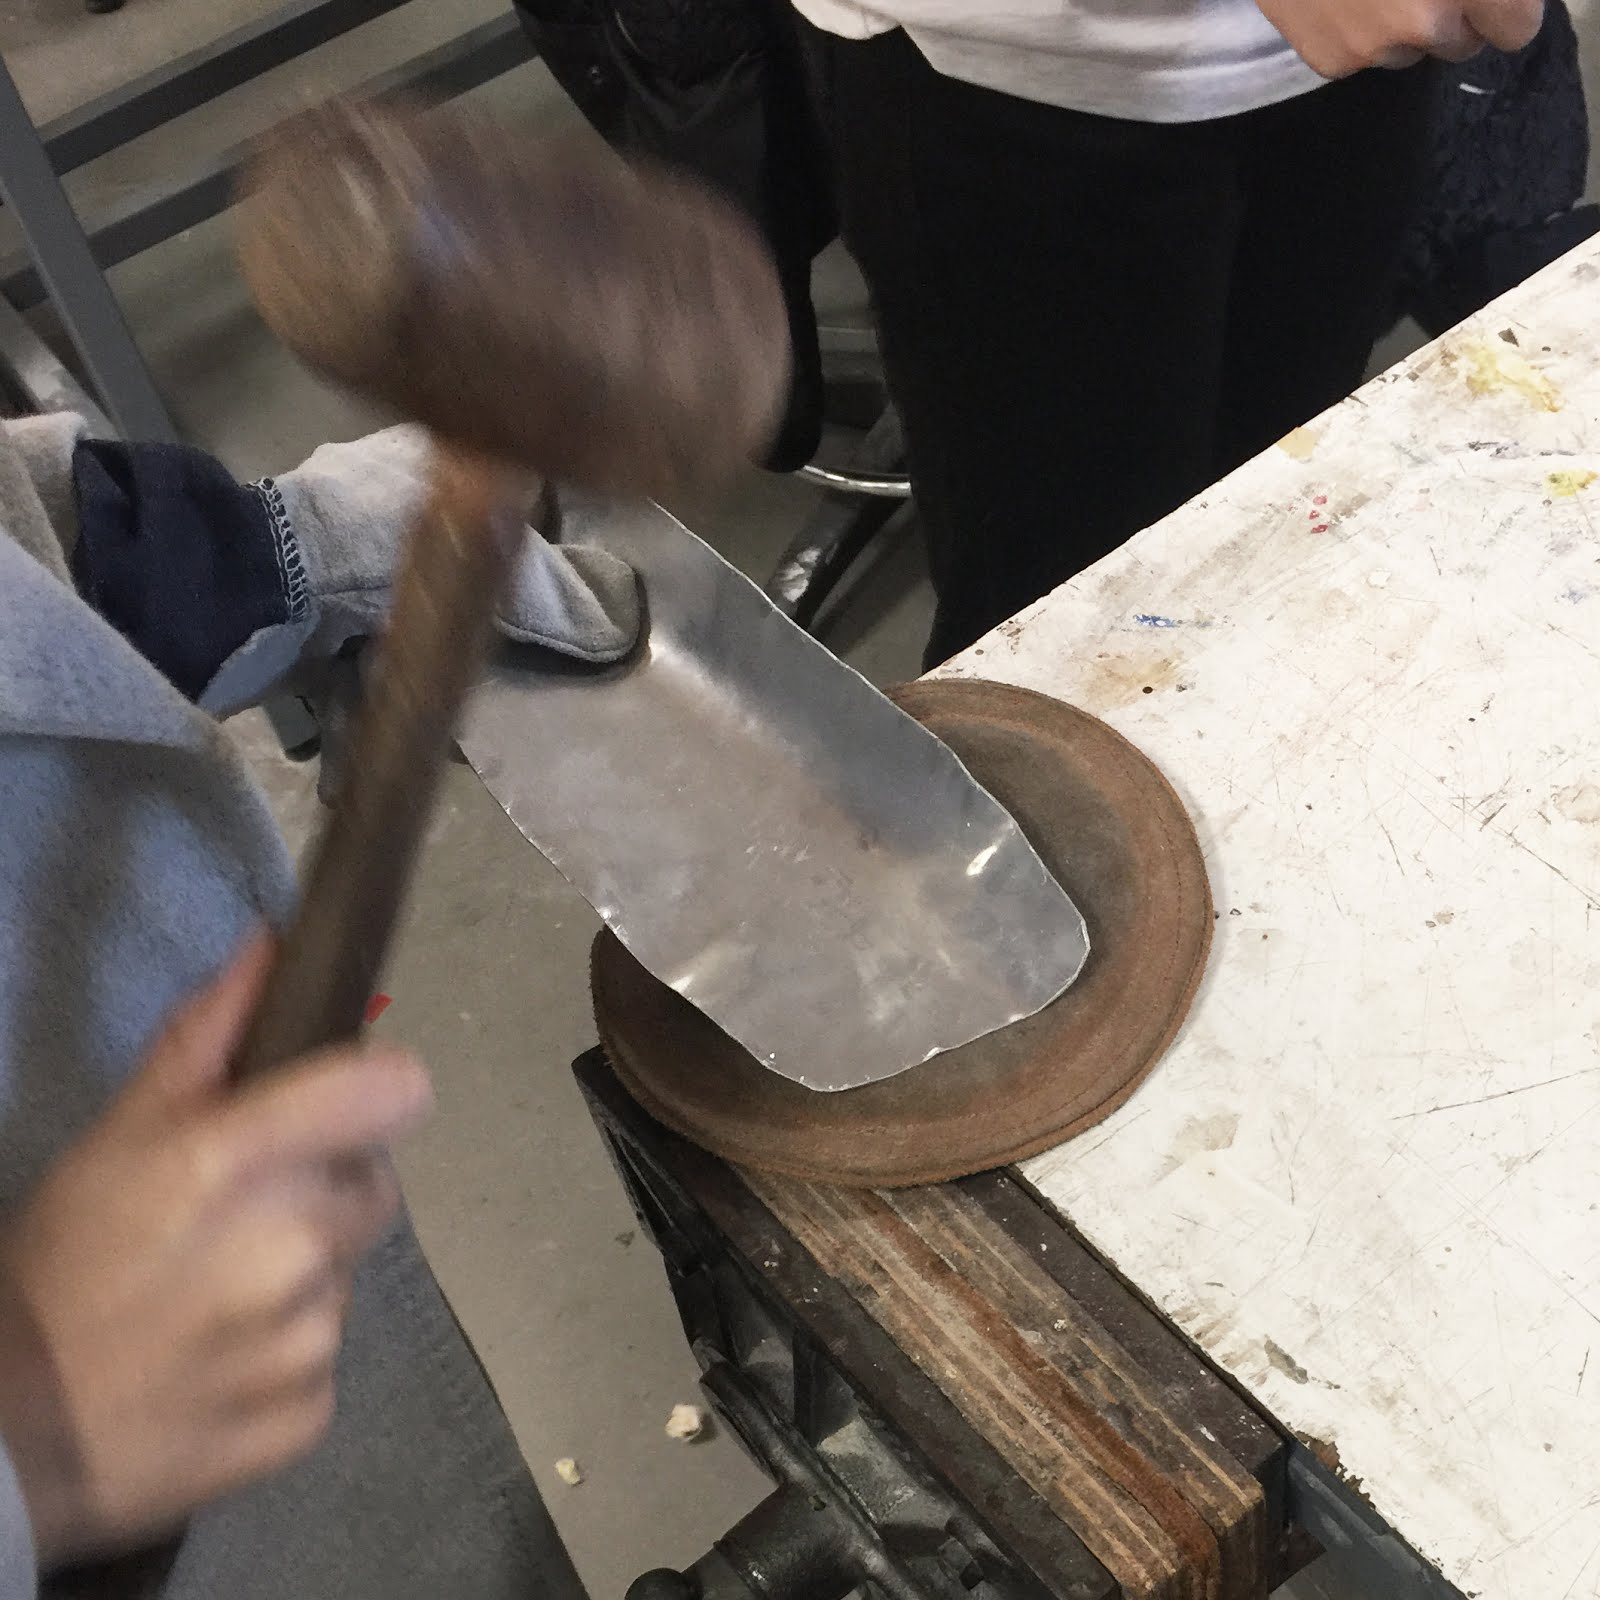
I first tested with the sharp end of plastic hammer on a sandbag and punched along the line to shrink this piece. Ends up uneven, so I used english wheel to reform a smooth curve (almost flattened).
Taking another attempt, I gently folded the piece with the metal bending machine. Followed by a few punches with the round end of wood hammer on a sandbag, to form a slight curvature on the flat planes. Looks much better this time, starting to fit on the car.

These steps were repeated so many times to get the perfect angle. I also punched on a small rectangular piece of wood placed along the line to form a sharper fold. I gently formed the curved edge by punches on the sphere metal shaping stand. Again, english wheel helped smooth the surfaces.
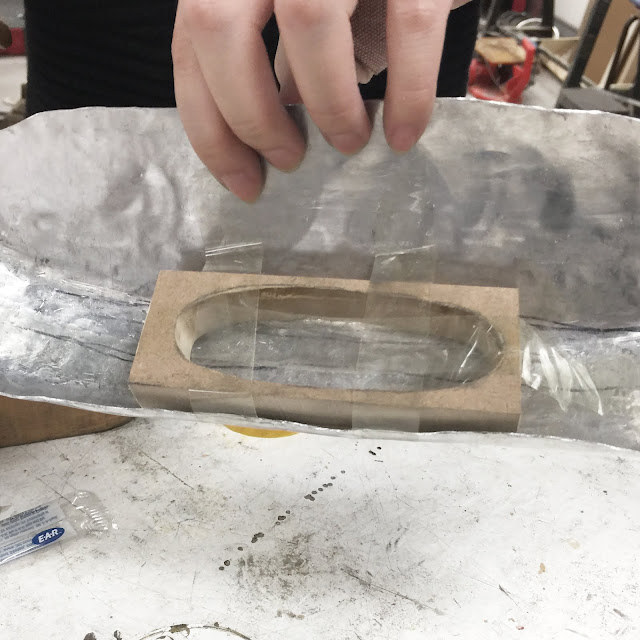
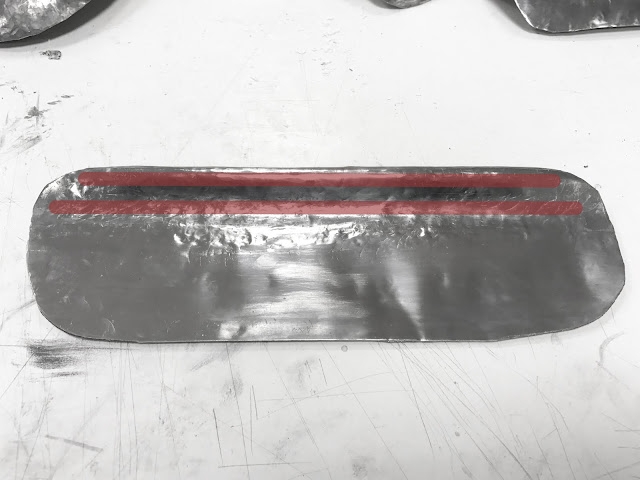
Then comes the fun part - car-lights. Found a spare piece of MDF, I carefully drew the shapes according to the real Ferrari, and cut out the templates. The template was fixed at the back with sticky tape, a few gentle hits with a small metal hammer. The edges were not sharp enough at first, so I trimmed and sharpened a piece of timber, and hit on it to form the sharp edges.
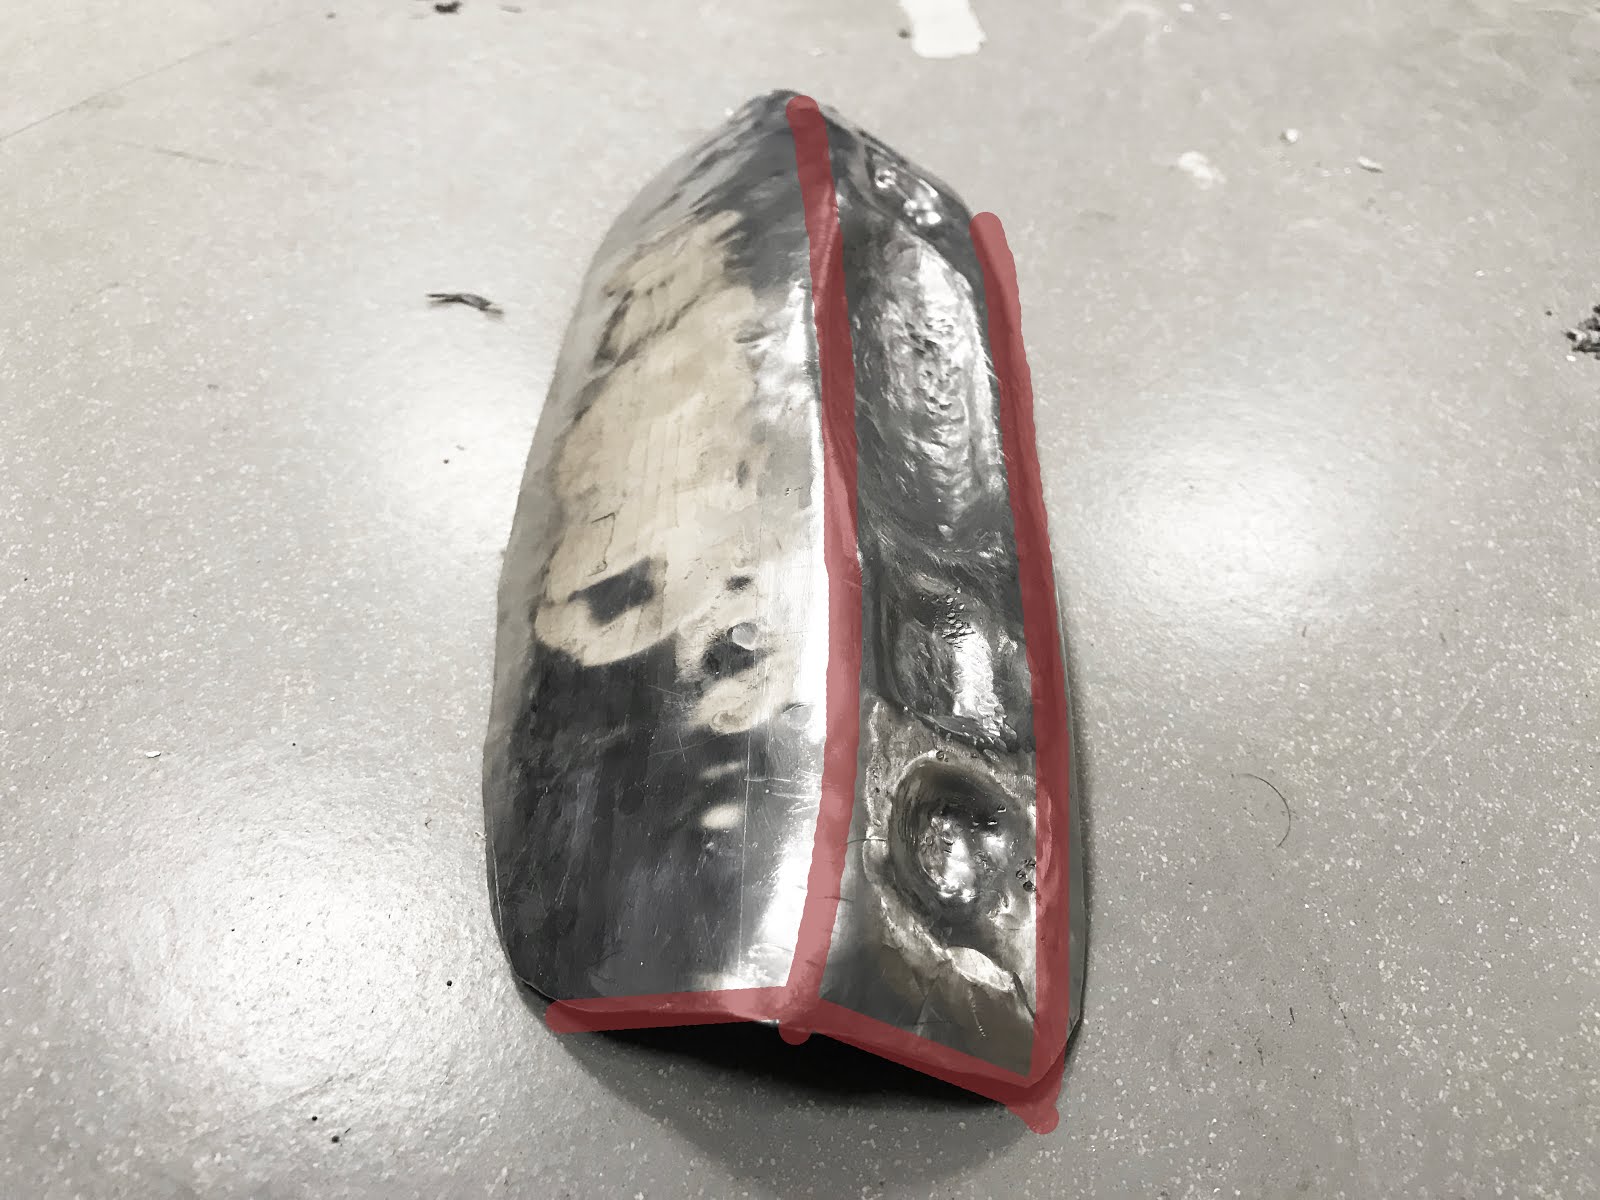
Car rear -
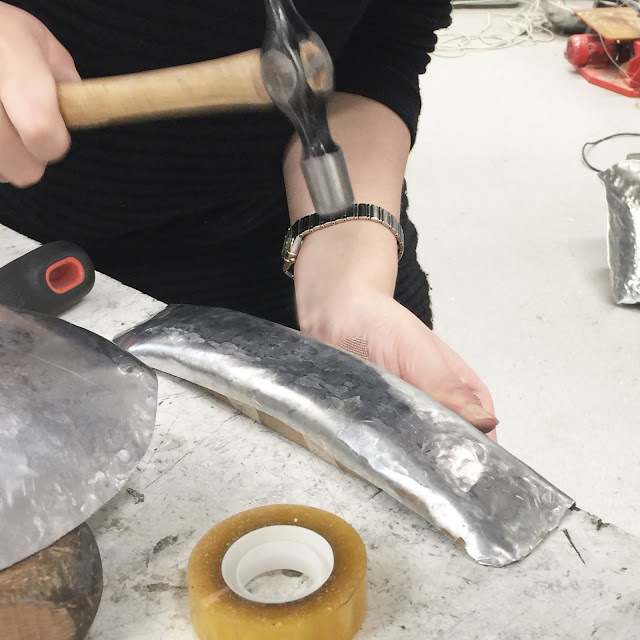
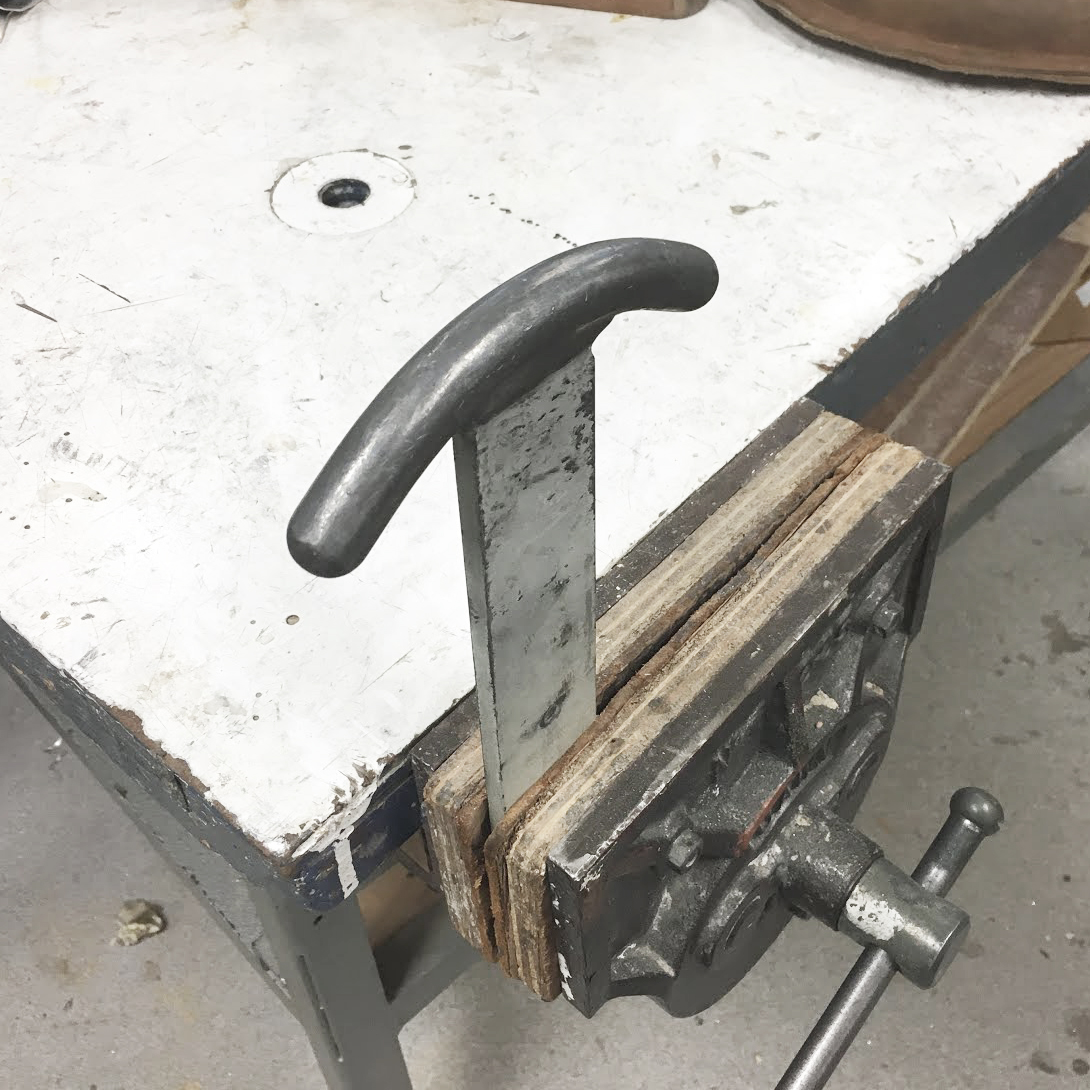
This part is similar but easier than car head. With the experience, the process was much faster. Similarly, I started with marking fold lines. There is one main fold and one small fold to join with car roof.
Tested when shaping car head, it is easier to form a fold with the metal bending machine first. As it is a small curve, I refined the shape with a small metal hammer on the thinness curve metal shaping stand.

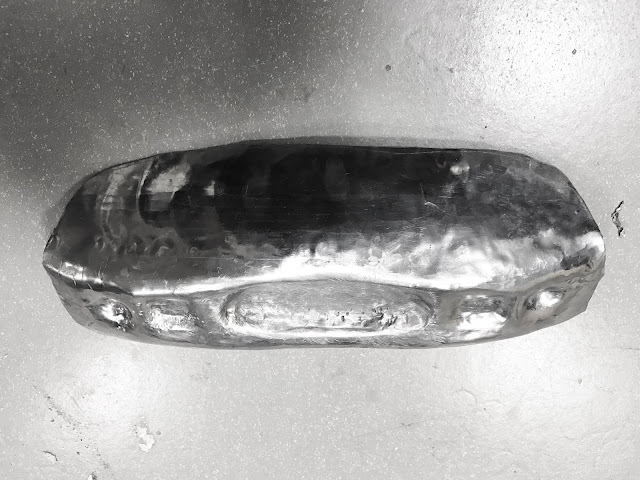
End result -
I marked lines where the piece should 'fold'. There are two sharp folds in this piece.

I first tested with the sharp end of plastic hammer on a sandbag and punched along the line to shrink this piece. Ends up uneven, so I used english wheel to reform a smooth curve (almost flattened).
Taking another attempt, I gently folded the piece with the metal bending machine. Followed by a few punches with the round end of wood hammer on a sandbag, to form a slight curvature on the flat planes. Looks much better this time, starting to fit on the car.


These steps were repeated so many times to get the perfect angle. I also punched on a small rectangular piece of wood placed along the line to form a sharper fold. I gently formed the curved edge by punches on the sphere metal shaping stand. Again, english wheel helped smooth the surfaces.

Then comes the fun part - car-lights. Found a spare piece of MDF, I carefully drew the shapes according to the real Ferrari, and cut out the templates. The template was fixed at the back with sticky tape, a few gentle hits with a small metal hammer. The edges were not sharp enough at first, so I trimmed and sharpened a piece of timber, and hit on it to form the sharp edges.


Car rear -
This part is similar but easier than car head. With the experience, the process was much faster. Similarly, I started with marking fold lines. There is one main fold and one small fold to join with car roof.
Tested when shaping car head, it is easier to form a fold with the metal bending machine first. As it is a small curve, I refined the shape with a small metal hammer on the thinness curve metal shaping stand.
End result -


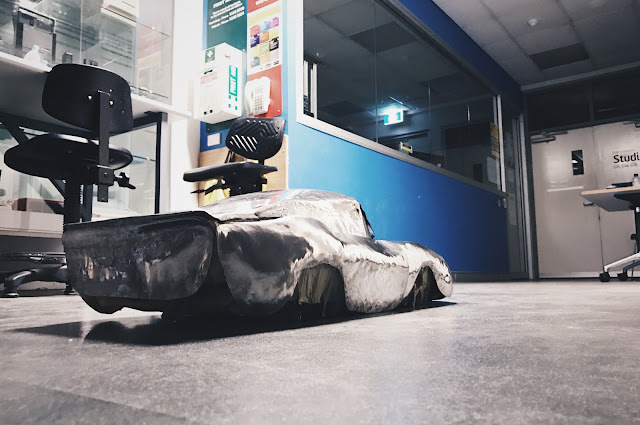
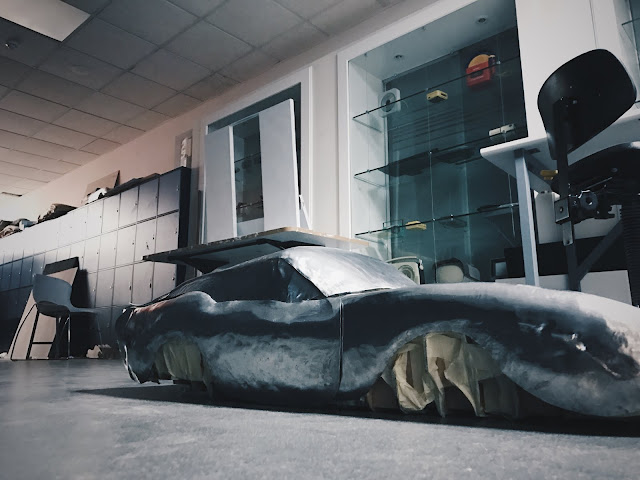
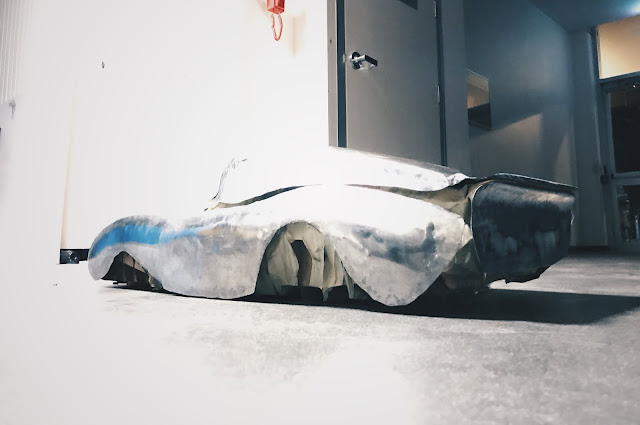
We have all finished our parts nicely by the end of the week, which is quite amazing. We have been behind everyone else's progress before the week and I was a bit worried. I feel very lucky being with this group as we all worked together as a team and cooperated so well. We've been helping out each other, checking along the way if adjacent pieces join together well, working together to produce this incredible end result.
[WEEK 13]
No class this week. All about polishing and refinement.
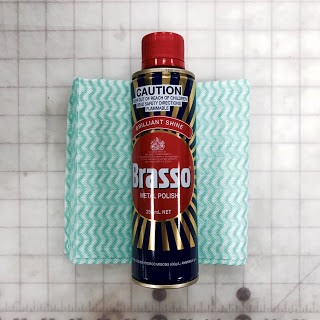
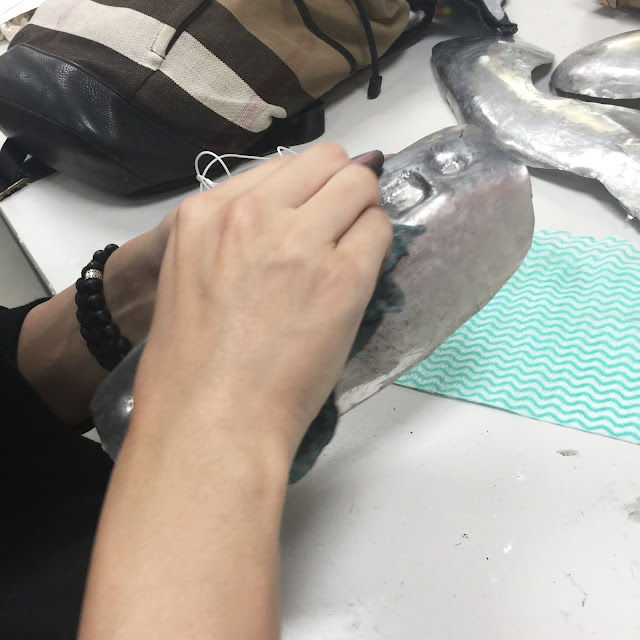
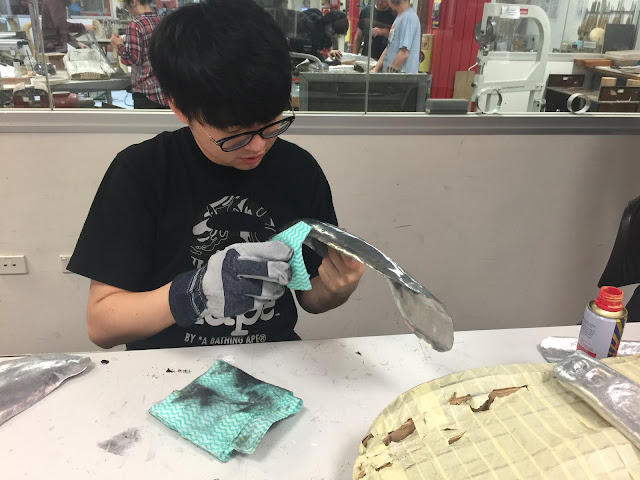
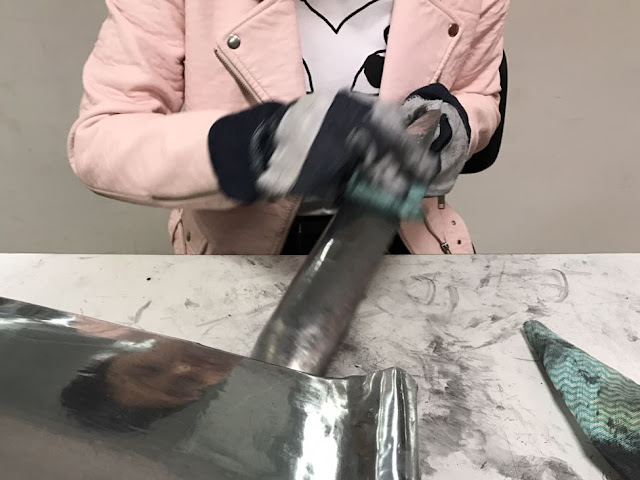
We've used Brasso Metal Polish and some cloths to polish the pieces, can be found at supermarkets. All the pieces have been cleaned and polished.
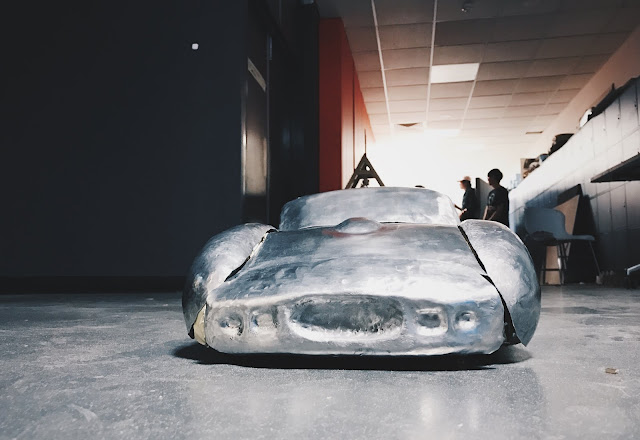
FINAL RESULT - FERRARI 250GTO MODEL
[WEEK 13]
No class this week. All about polishing and refinement.
We've used Brasso Metal Polish and some cloths to polish the pieces, can be found at supermarkets. All the pieces have been cleaned and polished.


FINAL RESULT - FERRARI 250GTO MODEL


Comments
Post a Comment